Showing posts with label Eggs. Show all posts

Thursday, March 12, 2015

Winter turns to Spring

At least it is working on it here. Let's be honest... this is the deep south. We didn't have "winter". At least not like the poor people up north that have been snowed in for months. But it sure has been chilly, and mostly grey and dreary. There has been nothing green in sight for months. I have been keeping busy, nonetheless. Taking care of my boys, keeping up the house, and tending to the animals is plenty to keep me busy most days. Having a baby around the house has been amazing! He has kept me the busiest and I am loving it. I can't believe my sweet boy is 6 months old already! He is spending less and less time nursing nonstop and being attached to mommy, and increasingly more time playing and exploring. 

That means that I have been able to get things accomplished (somewhat) lately and even a bit of extra time to be creative. I'm not what you would call "artistic" but I desperately need to be expressive and colorful. Usually the homestead quells that, but not during winter. So I have been turning these gourds that took over last summer...

... Into these birdhouses. Sunflowers even in the winter.


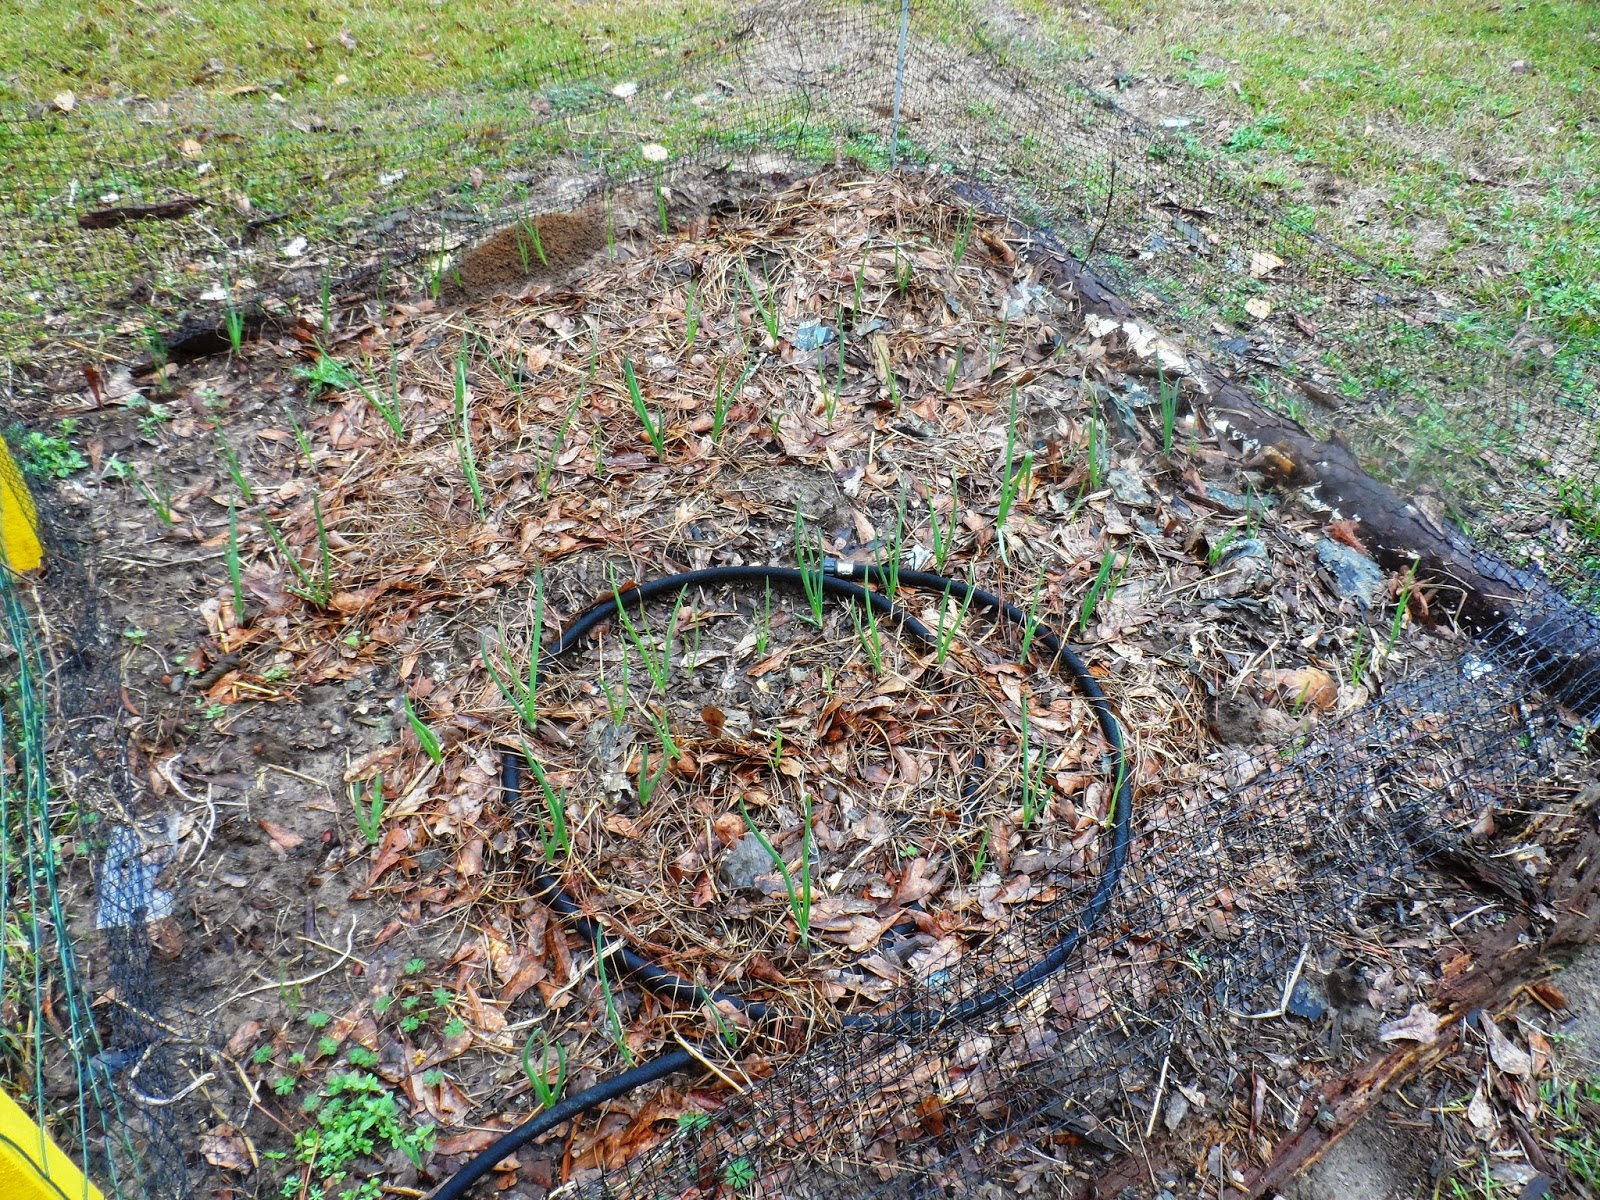
 It has rained, almost nonstop, for the last several days and is supposed to continue to do so for a couple more days. A sure sign that spring is here. During a short break this morning, little man and I managed to take some pictures. What was nothing but brown dead grass is starting to show signs of life. Hints of green can be seen peeking through. That means that soon the chickens will have enough to forage to keep them from gobbling down anything green they set their hungry little eyes on.
 Like the lettuce, collard greens, and cabbage I set out in several of my garden beds a few weeks ago. See them? No? That's because by the morning after I had planted them they had been gobbled up, despite the scratchy  fence around it. So I replanted and covered them in cayenne pepper which worked to keep them away from my flower beds last year. Apparently, when there is nothing else green in sight, a little pepper in the eyes is worth it.
 I did manage to get a bed of onions planted a couple weeks ago (and some peas to grow up that trellis) and they are coming up. I just managed to get the other 2 beds of onions and some garlic planted. Very late, but better late than never. Even small onions are better than no onions.
To get around not being able to plant anything until the chickens could be distracted by other greenery, my tax money splurge this year was a new greenhouse! I have wanted one for years and had planned to build one, but couldn't decide how to build one that would last. I found this one for an amazing price and it is super sturdy. Unless something drastic happens this guy should last for years! I plan to take it down during the summer to help extend its life somewhat. It is 8' x 10' x 7' tall. Now I just have to decide on what to do about shelving. 


Liam had a great time helping mommy plant seeds. There was soil flying everywhere! Never too early to get them started in the garden. <3 


I will need shelves for all of the summer garden stuff but I went ahead and started cold season crops. Lettuce, radishes, broccoli, cauliflower, several kinds of kale, cabbage, spinach, collard greens, chard... and perhaps a thing or two I have forgotten at the moment. The 4 covered plastic containers are filled with cactus seeds that I am starting for Keegan. It should be an interesting project. And maybe a money making endeavor for him. I also got sucked into the clearance section at the plant store. I got two little pomegranate trees for $3 each! I always wanted to try growing them but they don't over winter in this zone. But I have a greenhouse now! Now I need to find some avocado trees too. I have a mild avocado addiction that I really need to become self sufficient if I plan to keep.  The other ornamental plants were $1 each. I just can't pass up cheap plants... Also in the mix are herbs for the herb garden I am determined to get up and going this year. Some of it is mint... to replace the mint I managed to kill over the winter. Who said you can't kill the stuff?  


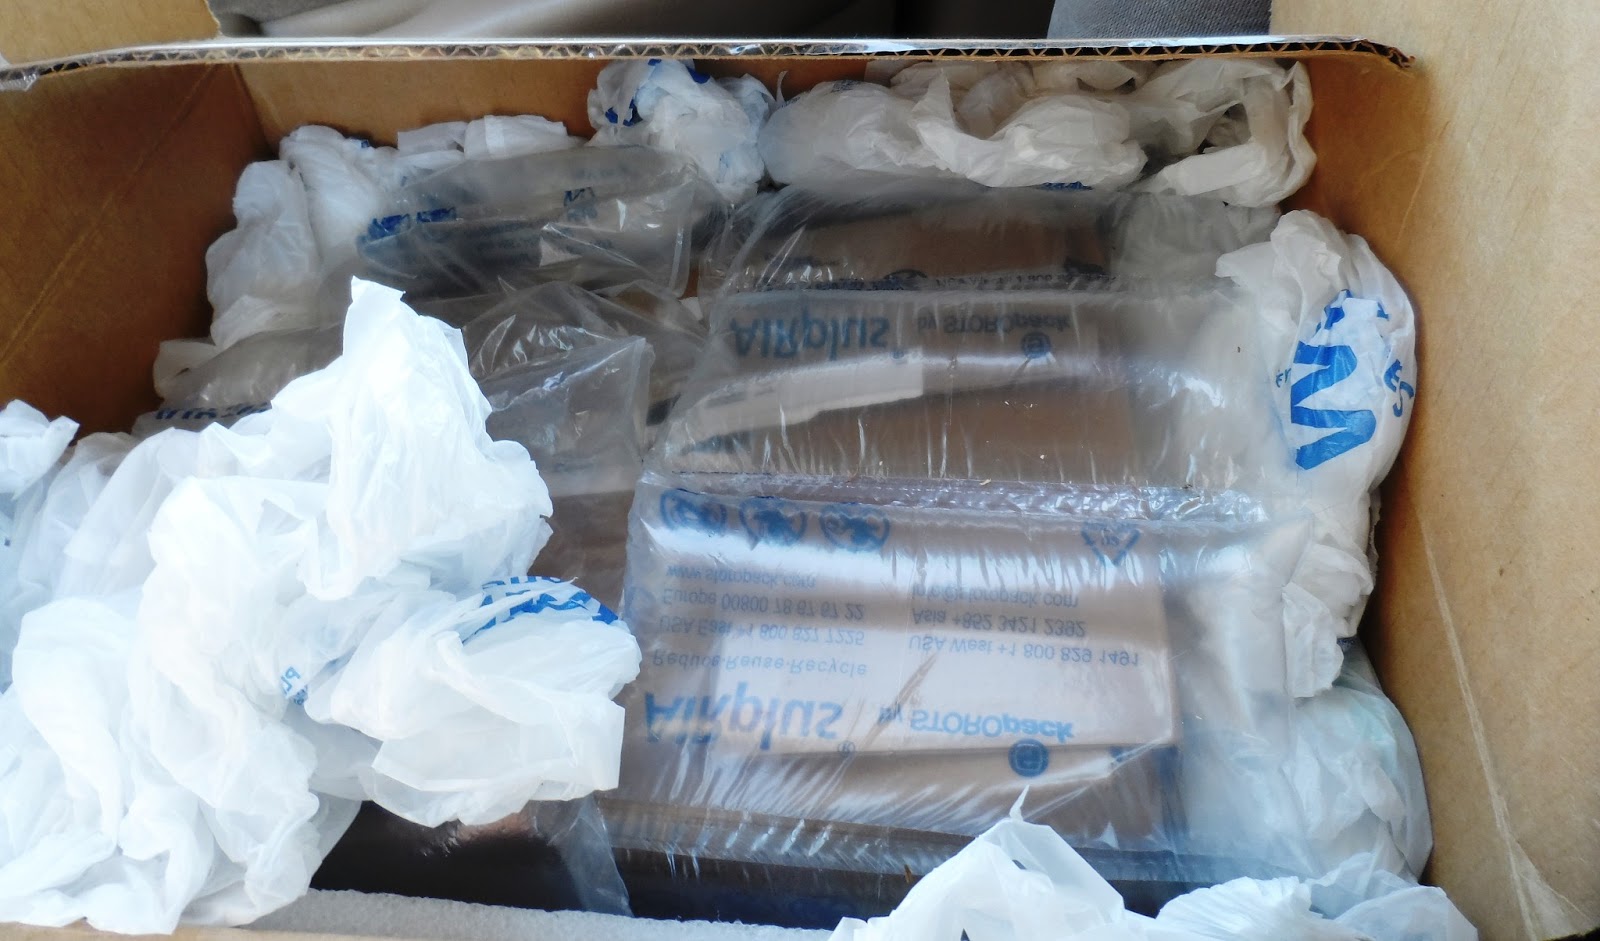
I was lacking planters so I used feed bags folded down for some and a box the greenhouse came in lined with feed bags for a big one. I hate throwing feed bags away and our feed store only sells cracked corn in paper bags. Yet another use for them. I would be more worried about the plastic breaking down if they were supposed to be more than just a temporary fix. Apparently it is working! Seedlings popping up everywhere. I believe that fresh grown salad is in my future! I have had to resort to buying lettuce at the store... ugh. 


The blueberry bushes are blooming! One of my favorite signs of spring! I gave them a little bit of compost fertilizer about a month ago, but it is about time for some more. I was a bit stingy with it. 


Some of the spring flowers are blooming.


And the chickens have started laying again! We went from not even checking the box for eggs for most of the winter to having them overflowing onto the counter. Just in the last week! We also had to deal with an opossum in the nesting box enjoying to new bounty a few days ago. Hopefully we won't have to deal with that again. 


The chickens are happy to have a break from the rain. They are also enjoying the warm weather! It has been in the 60's and 70's for the last week. This weekend begins the high 70's temps and sunshiny weather! I am so excited and am making my list of things I have to get done. 


My inside grow area is full too. The right part has been dedicated to our tree frogs and basically grows wild. The left section is filled with herbs for our herb garden. Six containers of Lavender. Brad LOVES lavender. He said it reminds him of Ireland. Chives fill another four containers, and basil fill the final two. We use lots of basil but it does well when direct seeded in the garden so I will plant more later. 

The beautiful basil is already coming up. I keep having to control my urge to pick some and rub it between my fingers so I can smell that wonderful smell. Liam loves smelling herbs too. I pick a leaf and roll it between my fingers and hold it under his nose and his wrinkles his little nose up and smells. It is the only time something can be near his face and he doesn't try to shove it in his mouth. I may have a little gardener on my hands! 


Thursday, April 3, 2014

Spring, Spring, Beautiful Spring!

Can you tell I love spring? The grass is turning from brown to lush beautiful green. Flowers are blooming. Birds are singing. The sun is shining. What is not to love?!

Everyone here at SHH is loving spring. The chickens are happily clucking away as they forage on the fresh new grass that is peeking through the dead brown undergrowth. They are laying a dozen eggs a day as a result. Even Laverne has been spotted multiple times, foraging and dust bathing. Laverne is my Easter Egger that somehow injured one of her eyes last year, and is blind on one side as a result. She usually never leaves the chicken coop, but apparently the sunshine and warm weather lately has been too much for her to resist.

The chicks moved out of the indoor brooder and into the "Tank" a little over a week ago. Not only have they grown, but they have multiplied as well. I went to the feed store to get feed and left with 6 new chicks. In my defense, I went in with zero intention of getting more babies! As it turns out, talking myself out of buying more fluffy butts is much easier when Keegan isn't begging and giving me an amazing argument as to why I really need to bring them home. He really needs to be an attorney when he grows up... Well he now have 5 more baby Easter Eggers, 1 Barred Rock which I'm pretty sure is a rooster, and the 10 Speckled Sussex chicks that we started out with. While the days have been warm, the nights have been cold. The "Tank" has a brooder box that is closed up at night but we sealed the windows and put an extra light to make sure they stay extra warm. When I open the hatch in the morning the babies come hopping down the ramp. The way they hope around flapping their little wings and sparring with each other they remind me of the flying monkeys from the Wizard of Oz. They are eating like pigs and seem to be thriving.

A couple of weeks ago (3/21 for my records) I put my first batch of turkey and guinea eggs in the incubator. The turkeys have been laying for about 3 weeks and I couldn't wait any longer. It is an addiction. I am using an egg turner for the first time with the turkey eggs. I usually turn them by hand. Working and other new developments going on around the homestead (to be announced soon) have me preoccupied enough for me to think that perhaps it would be best not to trust myself with that job this time around. Brad perfected the thermostat on the incubator (bypassed the one provided and built his own) so that it only varies by a fraction of degrees so I am hoping for a wonderful  hatch this time. They should hatch sometime around April 18th if all goes well.

Wednesday, March 5, 2014

No Longer Lacking Eggs...

We are overrun with eggs! Less than a month ago we had people asking us for eggs and had none to give. Now I am having a hard time keeping up with them long enough to crate them up and give them away, let alone get things situated well enough to sell them! My whole kitchen table is filled with eggs!

The chickens have ramped up production from less than 2 eggs a day about a month ago to 8-10 a day now. Considering that we have 15 hens, the numbers could be a bit better, but I already have no place to put them all! Keegan and I (mainly my wonderful son, Keegan) did a deep cleaning on the chicken coop over the weekend so the girls have a much cleaner, healthier place to live and lay. This really helps with the cleanliness of the eggs since the girls don't have dirty feet walking around in the nest. I don't wash my eggs because it removes the protective bloom and allows bacteria to enter the egg. Washed eggs also have to be refrigerated while unwashed eggs can be stored at room temperature. Dirty chicken feet mean dirty eggs that can't be sold.

Another source of our egg overabundance is the guineas! They have been laying for about 2 weeks now. Of course, they don't have a coop so finding the eggs is a bit more difficult. Keegan has been doing a great job of finding the nests and collecting the eggs. It hasn't been too awfully hard though. The guineas really aren't that bright. They have started several nests right in the middle of the yard. Out in the open with no cover at all. From time to time I will find a random egg laying the yard like the guinea just squatted where it was, laid an egg, and then went on with its day like nothing happened. Because there really isn't any way of knowing how long ago their eggs have been laid since they move their nest every time one is found, we have not eaten any of their eggs. I am really fighting hard the urge to put them in my incubator though! I am not interested in having more guineas than the 10 I already have, but I really love hatching babies! It is kinda like an addiction. I need to see if there is anyone close to me interested in buying guinea keets so I have an excuse.

My turkeys have been mating for a few weeks now, but sadly I have yet to find an egg. Those eggs I know I can incubate and sell. They won't be sitting around on the table wanting for a use. That's how it usually works...

In the mean-time the animals will soon be having a smorgasbord of scrambled eggs to clear the dirty eggs off of my kitchen table and get a clean start. It makes me really miss the pigs! They were happy with raw eggs. The rest of them are a bit more picky. Oh well :) Good unprocessed nutrients, vitamins, and protein. Better than store bought feed any day!

Monday, July 29, 2013

Productive Days Make Me Happy

When I woke up yesterday to see it overcast, yet again, and checked the weather to see that we were completely surrounded by thunderstorms, I thought that this weekend would be a total wash. Yesterday was, but it was nice to enjoy a day inside with the family. Today I tried to make up for it and I got so much accomplished!


The guineas and 3 turkeys graduated to one of the hoop coop chicken tractors! They were so excited to get to explore the grass! I love introducing babies to grass for the first time. They huddle together for a minute or two, and then one or two venture out to see what all of that green stuff is. Then before you know it, they are all running and flapping all over. The real fun begins when one discovers that bugs live in that green stuff! Tucker didn't waste any time at all. He doesn't seem to be afraid of anything. He is so adorably aloof. The guineas chirped and "Chrrrrrr'd" away as they scratched around in the grass. I got their grown-up feeder and bucket water system cleaned and sterilized and put the tarp back on to give them some shade and shelter.

I also added a new roost. I've been needing to put one in for a while but I wasn't sure how to go about adding one that wouldn't make the coop difficult to move and wouldn't put weight on the wire, but would be sturdy enough to hold the birds once they start getting bigger. I suspended a tree branch from the "spine" of the coop with thick wire. It is a lot like a swing, except that it fits snugly to each side so that it doesn't move around very much. The babies seem to be enjoying it, although they still decided to sleep on the ground in a huddle. Maybe tomorrow.

One of the reasons that the guineas and older turkeys moved to the hoop tractor is because I have had 2 batches of turkeys hatch out in the last 2 weeks! One batch is about 12 days old and the other is 4 days old. I have only sold 3, and still have 13 left (9 older 4 younger). The older babies were getting pretty rambunctious and the indoor brooder just wasn't big enough to give them the wing-room that they felt they needed. They were flapping and jumping everywhere! They knocked the filament loose on 3 light bulbs in one day and insisted on perching on top of the waterer. The funnel I put on top of it merely slowed them down.
The little ones are now happily residing in the "Tank" and my living room seems so much bigger! And quieter! The littlest tid-bits aren't getting knocked about and can rest now.


While I was cleaning out feeders I decided to collect all of the adult chicken and turkey feeders, disassemble them, scrub them out, and sterilize them. It doesn't seem like much, but I feel accomplished. I just realized that some of the pieces come apart. Feed kept getting stuck under the middle piece and molding, which is bad enough, but they were so difficult to clean like that! I took the middle pieces out and threw them away.Hopefully that doesn't come back to bite me in the butt, but I'm pretty happy with them! They are super easy to wipe out now and I feel so much better about them getting fresh quality feed! I left the middle part in the littles' feeder because they are small enough to climb right into it otherwise. Except for sweet Tucker who just steps over it with his giant crane legs.

My last accomplishment was to erect a new turkey tee-pee. Tallow has taken over the other tee-pee and is sitting on eggs. She is being such a good little momma to-be! When I called the turkeys to put them up this evening only the boys came. I found Tabby sitting in my Cosmos near the little garden, and Tawny in her normal nest. Both of them had around 6 eggs each. Heritage turkeys won't be full sized by the holidays at this point, and the spring baby-fever is over, so I have had a difficult time selling the babies I have. My problem is that I have some sort of strange inability to let turkey eggs go to waste. I don't like the consistency of the eggs, so I don't eat them. They are very thick. I need to girls to stop laying! I need to wash the incubator and put it up for the year. I put together a new tee-pee next to the inhabited one, and put all of the eggs I collected into it. Hopefully, one (or both) of the girls will decide to sit. I didn't get pictures because it was dark before I got done. I was working with my head-lamp (one of the handiest things EVER btw!).

It doesn't seem like a whole lot, and in reality, I guess it wasn't. But, I feel so much better after having worked all day doing things that really needed to get done. Better yet, knowing that what I accomplished had meaning. It wasn't just the usual mowing, clearing brush, or tending the garden. Don't get me wrong, those are all very important things. But everything I did today visibly made my animals happy, and I know will make them healthy. That makes me very happy! Maybe before I go to bed I will give the dogs baths too. That way I will have done something nice for all of my animals today. On second thought, I think they would be much more thankful for some left-over turkey and rice instead of their icky dog food.

I love productive days!

Monday, July 15, 2013

How to Incubate and Hatch Turkey Eggs

My turkeys are still laying! I expected them to slow down or stop by now, but they are still cranking them out! I'm so proud of my girls! Tallow, my Blue Slate hen, started sitting on a batch of eggs about 4 days ago. She has been doing such a good job! I have had to keep an eye out to keep the chickens from hijacking her nest and either laying their own eggs, or kicking hers out of the turkey tee-pee when she goes to take her potty and lunch break. I have been collecting the eggs and incubating them or selling them all season, therefore, trying my best to keep the girls from sitting, much to the ladies' dismay. Because it has been raining so much lately I thought it would be a good time to let her sit. The turkeys free range and unless I keep them put up until they lay in the tee-pee, they make new nests all over the property and every day turns into a perpetual Easter-egg hunt. The constant storms have made it difficult to find them before they get soaked, so a lot of precious eggs have been going to waste.

I have been selling hatching eggs and poults since February. I love sharing my babies with other people. Especially when it is their first turkey raising experience. I think I get just as excited about giving them their babies as they are about getting them! I have had lots of questions, though. There is so little information about raising turkeys available! I thought putting together a post would be helpful. 

The most asked question I get about hatching turkeys eggs is "Is it the same as hatching chicken eggs?"
The answer is: Mostly. The main difference is incubation time. If you have ever hatched chicken eggs, and even if you haven't, you can hatch turkey eggs! 

Egg Care Before Incubation:

Just like any other type of hatching eggs, it usually takes a while to collect enough to make a batch big enough to put in the incubator. DO NOT wash your hatching eggs. Eggs have a protective membrane on the outside of the shell, called the "bloom". Because eggs are porous, this protective coating prevents bacteria from entering the egg while still allowing gas exchange. The baby has to have access to air and moisture to develop. Washing the egg removes this and allows bacteria to enter the egg. I don't even wash the eggs I eat for this reason. If the egg is especially soiled then it should be discarded. Nothing is worse than a rotten egg explosion in your incubator! 

Eggs need to be stored in a secure place that won't get bumped or shaken. It is best for them to be stored between 55-65 degrees Fahrenheit. The eggs need to be turned at least twice daily. Most reputable breeders know this, but it is always best to ask if you are buying hatching eggs. I have found that the best way is to store them in an egg carton, large end up. Never store eggs pointy side up. They are large eggs, but leaving an empty spot between eggs usually allows them to fit well enough to be secure, though not well enough to close the top. Elevate one end of the carton a few inches by propping it one something sturdy, like a thick book or two. A couple of times a day, gently turn the carton around so the other end is elevated. They can also be stored on their side and each egg turned manually. The sooner they are incubated after being laid, the better, but they can be stored like this for up to 2 weeks with good hatchability. If your hatching eggs were bought and either shipped or hand delivered in a vehicle, they have bounced around quite a bit, even when the utmost care has been taken. They should be stored as mentioned above for at least 24 hours to allow any air bubbles from the air sac to settle back into the large end of the egg before being placed in the incubator. 

I always use a pencil to mark each of my eggs with the date when I collect them. I put the date on one side and number each egg on the other, so I can keep track of how they are developing. It comes in handy when candling the eggs later on. If you don't write the date on the eggs, you can always number one side and put an X on the other. This makes it much easier to ensure that each egg is turned appropriately. I also have a chart that I use to keep track of turning, candling, dates, and to write any observations or issues along the way. I know, the science major in me is showing through, but it REALLY helps! I am terrible about thinking that I will remember things, only to realize later that I didn't. It is also handy to keep everything together on one sheet of paper, which is usually stuck to my fridge along with a pencil so I have no excuse not to write things down. ***I will update this post as soon as I figure out how to attach a blank chart with this post that can be printed out. 

Setting Up the Incubator:

Place your incubator on a stable surface where it won't get shaken, vibrated, or bumped. It needs to be in a room that maintains a steady temperature. Do not put incubators in drafty areas or in direct sunlight. In general, near a window is a bad place. It still needs to be easily accessible and somewhere you can keep a close eye on it. I keep mine on an island counter in my kitchen. Its away from the stove, all windows, and air conditioner vents. I can see and access it easily, but it is in a rarely used spot where people won't bump or jostle it. 

Always allow the incubator to run for 24-48 hours to regulate the temperature before eggs are added. Once the eggs are added, the temperature will drop until the eggs come up to temperature. Don't touch the setting! If you have allowed the temperature to regulate for 24 hours before adding eggs, and it is stable, it will return to that temperature once the eggs warm up. Only after a 24 hour period, if the temperature hasn't come back up, should you attempt to adjust it. My biggest tip is to spend a little extra money on a thermometer/hygrometer. They don't cost that much and they make all the difference in the world! Keeping a close eye on the temperature is the best thing you can do to increase the hatchability of your babies. Temperatures lower than 99.5 F or higher than 103 F for more than brief periods can be fatal to embryos. 

Still air incubators should be set to between 100.5 to 101.5 degrees F.
Forced air incubators should be set to between 99.5 to 100 degrees F. I highly recommend forced air!
Humidity should be kept around 50-60% for the first  24 days and increased to around 80% for the last 3. In more humid climates, like here, it may not be necessary to add water to the incubator for the first 25 days. It needs to be more humid during the last few days to allow the poults to break out of the shell and escape from the membrane. 

Incubation Period

The incubation period for turkey eggs is 28 days, versus 21 days for chicken eggs. The eggs need to be turned at least 3 times a day for the first 24 days. Turkey eggs are too large for most turners. I never use an egg turner for them because I was told by someone with a lot of turkey hatching experience, that turkeys hatched from eggs that are incubated on end (like in a turner) have a tendency to be more prone to leg and hip issues. Because there is so little information on raising turkeys it is difficult to verify this, but I prefer to incubate them on their side and hand turn just to be safe. Also, because the eggs are hand turned 3 times a day, more attention is paid to the temperature, humidity, and general goings on with how things are progressing. Always wash you hands before handling eggs to prevent bacteria contamination that could kill the embryos. I usually candle around day 14 and again on day 20, but this varies slightly. It is tempting to candle constantly, but the more often you do it the higher the chances that something happens to harm the egg. It is really best to limit it to twice. I love to see the babies hopping around in there (usually more active than chicken embryos) but I mainly candle to get any undeveloping eggs out before they turn into rotten egg bombs. 

On day 25 your eggs need to go on "Lock down". I like to turn them number side up so I can keep an eye on which eggs are doing what. No more turning! The babies need to get into hatching position and absorb the rest of the yolk to prepare for the big outside world. Decrease the temperature to 98.5 degrees F and increase humidity to 80%. After that, Leave It Alone! That is easier said than done! My son always repeats what I spent a large part of his life telling him. "You look with your eyes, not with your hands." Opening the incubator causes temperature and humidity fluctuations, which are always bad during incubation, but can be especially detrimental during the last few days. Maintain a close eye on the temperature and humidity. If the humidity gets too low, the poults may become shrink wrapped inside the egg. If the humidity gets too high the poults can drown inside the shell. If the temperature is too high when the humidity is that high it can be fatal. If there is condensation forming on the viewing window the humidity is probably too high, although this is rarely a problem. Low humidity is usually the issue. A tip for those using styrofoam table top models: If your humidity keeps dropping quickly, try putting a little weight (a book works well) on top to keep it shut tightly. They tend to bleed moisture out of the cracks. That being said, the babies need oxygen (throughout the whole incubation period) so don't plug all of the holes! Wet sponges placed in the incubator may help, as well. Surface area, not depth, of the water source is key. 

Many times, the poults will begin hatching, or all may even hatch, on day 27. Most should hatch by day 28. It isn't nearly as common to have poults that hatch late as it is with chicken chicks. Turkey poults can be left in the incubator for 24 hours without food or water. I've read up to 48 hours, but this makes me nervous. Opening the incubator to get poults out will cause a temperature and humidity fluctuation, which is bad for the rest of the unhatched eggs. It is best to let them all hatch before opening the incubator to remove any. That being said, I usually get mine out periodically before all are hatched. I do this because I incubate a large amount of eggs at a time, and poults tend to be really active and clumsy, bumping all of the rest of the eggs around. I don't suggest others do this, because all experts explicitly say not to, but I haven't seen ill effects. I don't do it often, and when I do it is done very quickly. Maybe I have just been lucky. Its probably a case of being better to do as I say, not as I do... so many things are! LOL 

Have the brooder set up and ready before hatch time to make sure the temperature is stable before the babies are added. When the poults have dried and fluffed up (and preferably, all of their hatch-mates have hatched) they can be placed in the nice, warm, draft free brooder where its high protein starter and warm water with added nutrient/electrolyte supplement are waiting! 

The final step when hatching turkey eggs? Enjoy your new babies! I can hear a sweet baby from my latest batch chirping from inside its egg as I type!

Time to go watch the miracle of life happen right in front of my eyes. It never ceases to amaze me! 

Another post to come on how to care for new turkey poults. 

Friday, April 19, 2013

1st Batch of Turkeys Hatched!


 The first batch of turkey eggs I had in the incubator hatched! I love sweet little baby turkey-heads! Out of 18 eggs, 4 of them weren't fertile (I'm thinking Tabby's first eggs. She has since started allowing the toms to do their thing), 1 quit around the time I added the 2nd batch (I'm thinking the temp flux was too much for it), and 1 quit a day or two ago (not sure what happened there). So 12 out of 18 isn't a great hatch rate but the 2nd batch appears to be turning out much better so far. Lets hope that this batch didn't shake them up too much! I knew that was going to be an issue when I started but I had a ton of turkey eggs and only 1 incubator!

Tallow's (Blue Slate hen) eggs had a perfect hatch rate and all of her eggs hatched first (a day early)! I believe that I ended up with 7 pure Bourbon Reds and 5 Bourbon/Slate mixes. Poor Yellow, my self blue tom, doesn't get mating privileges since he is toward the bottom of the pecking order so I didn't get any pure slates. I'm planning to work on a make shift breeding pen for them so I can get some slate babies this year. The coloring of the mixes surprised me! Two of them look like I would have expected. They look like slates with a little bit of a red tinge.
The other 3 are black tinged with red with a red belly and yellow around their eyes! I guess the slate (black) gene is stronger than I thought. They are so pretty and sweet!

 I have been planning to sell this batch since I set them but they make it so difficult! I get attached to them! The first batch of eggs that I sold hatched well! I heard from the new proud turkey-momma and she said that out of 12 eggs 9 pipped and 8 hatched. I'm not sure why the one pipped but didn't hatch but sometimes those things happen. That is a pretty darn good hatch rate for shipped eggs! She said she is already addicted to turkeys and was asking about buying more eggs already! I'm glad that she decided to wait for a little while and see how she does once they get bigger. She didn't get any black chicks. I need to look into the genetics. I'm really excited to see what these babies look like when they get bigger and feather out! I also sold 2 dozen more turkey eggs tonight so I hope that I can keep in touch with her and see how they turn out! I love keeping tabs on my grand-turkeys. I'm also a scientist at heart and like to know hatch rates and coloring. I will never make money raising and selling eggs, chicks, and poults, but it helps to pay for the feed and allows me to keep them and I REALLY enjoy it! I love sharing what I enjoy with other people! <3

Edited to add:
I had a second batch of turkey poults hatch out on 4-30-13 :)
14 total: 3 black, 3 blue, 7 bourbon reds.
All sold... I guess I need to start another batch in the incubator so I can have some! I really want some more blue slate hens! I need to start on a coop for Yellow and Tallow so I have a chance at getting some before the stop laying for the season.

Monday, April 8, 2013

The Turkey Tee-Pee is a Success!


I am very happy that the ladies seem to have taken to the turkey tee-pee almost immediately! The day after I installed it they scratched all of the leaves out of it, and in front of the pallet was an egg. Whether the egg was laid in the tee-pee and scratched out with the leaves, or was laid out in the open, I don't know. I replaced the leaves, but they were scratched back out again. I have not found another egg laid out in the open though! Every day I find two or three eggs laid directly on the feed bag lined pallet. I have added more leaves several times but they just don't seem to have gotten the idea that they belong in the tee-pee! Either way, it is a success! I even saw two of the ladies (Tawny and Tallow) in the tee-pee at the same time. Most of the toms don't seem to be interested in going into the nesting area at all and every egg has been in perfect shape. I have, however, caught one of the toms in the tee-pee sitting on an egg! I have read that sometimes toms will sit on eggs, but I never expected to see it! Something even more unexpected than that happened when I let the turkeys out to range today. Einstein, my Easter Egger rooster, ran into the turkey coop after the turkeys left. Tabby was still in the tee-pee tending to the egg she had just laid. To my surprise, Einy hopped on Tabby's back and tried to have his way with her! Tabby hopped up and ran out of the coop, with Einstein riding on her back the entire way! Quite the adventure! He was taking advantage of the tee-pee working as well! I love when my frugal ideas work out this well! Who says you can't get something for nothing?!


Wednesday, March 27, 2013

Busy, Busy Bee

I Love my Azaleas!
Things have been slowing down at the tax office that I work at, just in time to try to keep up with all of the things that are going on at the homestead. Notice, I said try. I am still falling behind! Coops need to be built, fences put up, and gardens tended to. None of the projects I needed to do over winter were accomplished. It seems that we either have the time or the money, but never both at once. Oh well. All in good time. I have still been busy!

The turkeys are doing great! Two of the Bourbon Red Toms are destined for the chopping block in a couple of days. There are just too many toms for my 3 poor hens, and they are fighting amongst themselves. Choosing which ones will go is difficult. Turkeys really are easy to get attached to, but this has been the plan for them since we got them as poults. I keep reminding myself that the life that they have had is turkey paradise and their death will be as painless and free of fear is death could possibly be. I refuse to give money to factories that raise birds any differently. I also don't want to put those unhealthy birds into my family's bodies.

The second generation of turkey-heads are in the incubator! I set 18 turkey eggs on the 22nd and their hatch date is April 19th! I have not separated the breeds yet so they are going to be a mix of Bourbon Reds, Bourbon/ Slate crosses, and there may be a blue slate or two in the mix. That is doubtful though because my Self Blue tom, Yellow, isn't the alpha tom and despite how hard he tries, he usually doesn't get mating privileges. One of my next projects is to build two small hoop coops. One of them may be used to give Yellow and Miss Tallow the privacy they deserve and, hopefully, give me the Blue Slate eggs I so desperately want! I may increase the gene pool by buying eggs from a friend of mine who also raises them. Hopefully, most of the poults hatched from this batch will be sold and the next batch will be used to increase my breeding stock.

Scissorus
One of the three chicks hatched in my emergency incubator, named Scissorus (Keegan said he was Roman), had scissor beak. I tried to feed him and give him water, but he wasn't doing well and his beak got worse every day. He didn't make it. The other two (both roosters, BO/BO and Einey EE/Ruthie NH?) are doing wonderfully, and we had a wonderful surprise last week when another egg from the emergency batch hatched! They have a cute fluffy little brother or sister (EE Greta mom- BO Jack dad). The rest of the eggs were duds, but I am overjoyed to have saved this many of them!
Keegan, INSIDE the chicken tractor playing with the babies.
Coincidentally, this was shortly after he he told me that he
doesn't actually like chickens (I asked him to feed them). <3
The "Outside Babies" are doing well and are getting HUGE! They will be too big for that chicken tractor soon. The other hoop coop I am going to be building will be for most of them. A few will be going into the project after that: boxes that fit directly in my raised garden beds so they can scratch around, till and fertilize the soil, and get rid of any bugs or weeds that are in there. My garden beds should be ready to go soon! This morning when I was feeding them before work I noticed a single bloody-ish looking stool in the coop. I have noticed the silly things hopping on top of their waterer, even after I raised it off of the ground to keep it clean, and are pooing in the water. I'm worried that one may have coccidiosis, which means they all likely do or will, so I treated the whole flock with Sulmet. I will treat them again when I get home. They are on medicated feed but when they are this young I don't like to take any chances. I don't give medication for the sake of giving medication. Not to myself, my family, or my animals. That is why we have the super-bugs that we do now-a-days. None of my adult birds are on medication, but babies are much more prone to getting sick, regardless of how well they are taken care of. They are all taken off of medicated feed when they are 8-10 weeks old and their immune system is stronger. I tried giving the babies unmedicated feed last year and nearly lost my whole batch to cocci. I am a fanatic about keeping coops clean, but apparently sometimes that doesn't completely eliminated the risk. As icky as many people think it sounds, it is VERY important to keep an eye on your poultry poo! Sometimes that is the first, or only, sign that something is wrong. It also helps to catch things early enough to do something about it!

No matter how many egg baskets I get, this is how my eggs
usually get carried to the house. :)
The adult chickens are producing lots of eggs and they are selling really well! I have to make sure to keep some back for us! Our foster puppy, Chicago, has been fighting Pneumonia since we brought her home. We have had her for nearly two months and her improvement is amazing! She couldn't breath through her nose at all when we first got her, and would not eat. She was losing weight rather than gaining it like a puppy should. After changing her antibiotics, she showed a little improvement with her breathing, but not much with her eating and weight gain. I gave her wet food, dry food, NutriCal nutrient supplement gel... nothing seemed to work. I was really getting worried that she wouldn't make it, simply because she wouldn't eat! Finally, not knowing what else to do, I started giving her boiled eggs. Farm fresh pastured eggs are packed full of nutrients and protein. She ate them! She started gaining weight and getting her energy back immediately! She also got her appetite back and began eating like a horse! She goes through more dog food than I think she has room to put it in her bony little body, but she is increasing the space every day! She is on another round of antibiotics to try to get rid of that last pocket of fluid in her lungs, and her medicine is delivered twice a day, you guessed it, hidden in the middle of a boiled egg! All the antibiotics in the world wouldn't have helped her without her getting the nutrients that her body needed to give her strength to fight the infection. Ah, the power of eggs! She is going to be healthy enough to be spayed soon and then will be on her way to Maine to find her new forever family! I love happy endings!
From bottom to top: Elliot, Chicago, and Ari is hiding way in the back. 

All of Sunflower Hill is covered in snow white dew berry
blooms! What could be better? The whole place
being covered in dew berries soon! 
Speaking of happy things, the seedlings I planted are still alive! Yes, I am thrilled about this! I love growing things, but starting seedlings inside has always been my downfall. They always start out strong and then wilt and die. The tomatoes are getting really big and the peppers are looking dark green and strong. All except for the jalapeno peppers, none of which came up at all! I'm probably going to have to replant those. Some of the eggplants failed to come up, as well. I am loving my new seedling shelf in the kitchen! I think that the space put aside just for them in a draft and bump free area, and the shop lamp hung over the trays, might just keep my seedlings from dying before they get planted! The strawberry plants have tiny green strawberries and flowers on them. Now I need to fence the strawberry patch off so the chickens don't get them all before I get any this year! The peas have sprouted, the brussel sprouts budding, and I got my first little bunch of broccoli the other day! I am counting down the days until I get some fresh dewberries!

All in all, everything here on the homestead is bustling and growing! That is what spring is all about! I am loving life, busy busy busy as it may be, up on Sunflower Hill!

Wednesday, March 20, 2013

Shipping Hatching Eggs

I sold my first hatching eggs! I had not gotten my incubator ready and I really wanted to separate the Bourbon Reds from my last two Blue Slates so I could try to increase my breeding flock, but I really hated to waste perfectly good fertile eggs. I thought that surely someone would be interested in them, so I listed them on the local poultry swap Facebook page. I didn't have high hopes that anyone would want to buy my mixed breed turkey eggs, but figured that someone local would at least save money by not having to pay shipping. The response was amazing! And most of them lived several hours away and were willing to pay for shipping! My sweet little turkeys have always been impressive to me and people would have thought that the eggs were made of jewels or gold as excited as I have been about them, but I was a bit surprised to see that others shared my point of view. I have a waiting list of people that want me to get in touch with them when I have more eggs or when I hatch out babies. I'm kinda worried that I might not get any of my own! I'm going to have to put some in my incubator as soon as I get them separated before I sell more because I don't know how long they will continue to lay.

I made sure that the buyer knew the risks of shipping eggs. The USPS is the only service that will ship hatching eggs and they are not always the most gentle with packages. It makes me a nervous wreck when I order chicks, but they are loud and make it difficult to forget that the package is fragile and needs to be processed quickly. Even so, I had a box of chicks lost in the mail last year. I called everyone I could find a number for, eventually getting in touch with the person in charge of postal service for the entire state. By the time we located them and they were sent on to me they had been in the mail for more than 3 days and over half of them were dead. The hatchery was wonderful and gave me a full replacement, but it didn't make me feel better about all of those poor chicks dying needlessly. Loosing or smashing the box aren't the only things you have to worry about when shipping eggs. Temperature fluctuations, shaking or jarring of the box, and even turning the box upside down for long periods are enough to damage the eggs and make them unhatchable. The air cells in the eggs need to remain intact. Even if the eggs are not cracked or broken, the contents can be scrambled inside the egg!


I went to extremes to ensure that the eggs arrived in one piece. I found a small box that all of the eggs would fit in with about twice the amount of room than the eggs would need. I padded the sides and bottom of the box with foam. Then, I wrapped each egg in a sheet of bubble wrap and taped it. The wrapped eggs were placed on their sides (I figured that it was more likely for the USPS to turn the box upside down than sideways, upside down would disrupt the air sac). After covering the wrapped eggs with another sheet of foam, I taped the box up well. I wrapped that box in a larger sheet of bubble wrap and placed it inside a larger box that had been lined with crumpled up shopping bags (I hate paying for something that gets thrown away when I can reuse something that would have been thrown away or recycled, anyway!). I padded the entire box with the crumpled shopping bags so that there was no movement of the inner box and I felt that it would add enough of a bumper area, including the top of the box. I then took the box to the post office and had them tape it closed really well for me. I wrote on the top and all four sides that the contents were fragile and that there were live embryos in the box. The postal worker told me that it is actually illegal to ship live embryos, so I made sure I added on the outside of the box that they were hatching eggs. I wanted to make sure that they would not X-ray the package and damage them in any way. I had them shipped express and asked them to hold the package at the post office, rather than having it ride around even longer, on potentially bumpy roads, with the postal worker, and the have it delivered in conditions that may not have been favorable. I put the customers phone number on the box and wrote that they should call her on arrival.
 Because there was tracking on the box, I knew when it had arrived at the post office. I texted her and made sure that all of the egglettes had arrived and she was happy with her order. She said they all made it in perfect shape, and that her and her children were really excited about hatching turkey poults! Of course, they could be internally damaged and it not show on the outside. Unfortunately, turkey eggs are really too thick to candle, so we won't know for 28 days. I sure hope her and the kids get to enjoy some sweet baby turkey-heads soon! She promised to send pictures of my grand-chicks if/when they hatch! I think I am just as excited as they are! I wish them all the luck in the world and hope that they enjoy their round-headed babies as much as I have enjoyed their parents!

Friday, March 8, 2013

Emergency Egg Incubator

Home-made emergency incubator
First pip!
The first baby fluffing up


About a month ago I was having a really difficult time keeping one of my hens from sitting on every egg she saw. I only have time to collect eggs in the evening when I get home from work some days, and I really didn't want her sitting on all of them in the meantime. I decided to number some eggs and put them in the nesting box for her so she would leave the rest of my eggs alone, and because I am always secretly wishing for more fluffy butts. :) She sat on them all night and then for an hour or two during the day, then she would leave the nest and play with her friends. Oh well, at least she wasn't sitting on all of the eggs I planned to eat or sell. After about two and a half weeks I decided to candle the eggs, just to see. It turned out that there were actually babies inside! They were due to hatch on the 21st... nothing. After another week I decided to dispose of them before they turned rotten and exploded. I am always paranoid and decided to open one up just to make sure I wasn't committing mass murder, and sure enough, there was a poor little baby inside it. I was heart broken to have killed the poor thing. The eggs stayed in the nest. After a total of four and a half weeks, after putting the eggs in the nest, I found a poor sad little chick, still wet, but dead in the nest.
Come on guys, you are almost there!
Poor sweet little baby. :( Sometimes this happens, I thought, and left the momma alone. Unfortunately, it didn't stop there. I found 4 more babies, still wet, but dead in the nest. When I reached in another egg that was pipped chirped, and the broody started pecking at all of the eggs furiously! To my horror, I realized that she had been killing the babies as they hatched! Well that was just not going to cut it! I immediately went inside and started looking for something to make a make-shift incubator out of.
I took a large soup pot lined it with paper towels, and wrapped several bath towels around it. I put wet paper towels into soda caps to keep the humidity up but the bottom of the incubator dry. Next I put a thermometer in it, a sheet of plexiglass over it and set a desk lamp with a 60 watt bulb over it. I made sure the temperature was regulated by moving the lamp up and down until it stayed at the 37.5 degrees Celsius (99.5 Fahrenheit) and didn't change. Finally I went and got the eggs, making sure not to turn them, and placed them in the incubator in the same position that I had taken them out of the nest.
Wow, hatching is hard work! He somersaulted out of the
egg, landed like this, and laid there for several minutes.
He needed some rest!  
It was risky and I wasn't sure if I had killed them by moving them, but I figured that at least they had somewhat of a chance this way. Of course I watched the incubator like a hawk, and it killed me not to mess with them. Finally one pipped! And then another, and another! Three beautiful little babies hatched! One appears to be a pure buff orphington, the second an easter egger, and the third I think is a
New Hampshire Red X Easter Egger cross. I am so excited! There are 3 more eggs that are numbered and haven't pipped. I'm not sure if they will hatch, but I am leaving them for a couple more days just to make sure. She didn't exactly sit consistently.
Several more were laid after the original batch was put in the nest, so I am still hopeful that they will make, it will just be in a week or two. I have learned that I should always have an emergency incubator on hand just to make sure, but I am overjoyed that my little thrown together incubator worked! My real incubator came in the mail today. It will soon be loaded with turkey eggs!
All three babies hatched, and proceeding to fowl... uh,
foul the incubator. 
Because I only hatched 3 babies, and they are so much smaller than the babies that are in the chicken tractor brooder, I had to improvise a make-shift brooder as well. I used a large canning pot (they were hatched in a soup pot, right? May as well stick with the theme!), lined it with a plastic bag, filled it with pine chips, and connected another desk lamp to the side. Note so self... I really need more desk lamps. Apparently they come in handy. And more thermometers too! I am nearly out! Anywho, The problem with the canning pot was that I only have large waterers and they would take up the entire place. I used a 20 ounce soda bottle, lid removed. Wrapped some sturdy wire around it tightly, so the bottle won't slide up or down. turn the bottle upside down and bend the wire to make a hook. I filled the bottle with water and chick nutrients, turned it upside down into a small bowl, and hung the bottle over the side of the brooder with the opening of the bottle about 1/3 of the way into the bowl. Once the water fills to the opening it will stop. When they drink it will automatically refill to that point. Love it!
All fluffed up and in their brooder <3