Monday, July 8, 2013

Dehydrated Onions

The onions that Keegan and I pulled at the you-pick have been amazing! We use them in almost everything, so we brought home two 5-gallon buckets overflowing with red, yellow, and white onions. Even though I put them in breathable bags and hung them in a dark, cool, area, some of them were starting to get soft. I always cut twice the amount of onions than I need and put half of them in the freezer, but I hate taking up all of that valuable freezer space when chopping a large amount. I compromised by putting half in the freezer and dehydrating the other half.


I picked out all of the soft onions and
put the good ones in a clean cloth bag and hung them back up. They should keep for a good deal longer as long as they are kept dry, especially since there aren't as many together in the bag. Even when the outer layer starts to get soft, the majority of the onion is usually in perfect condition. After cutting the soft spots off and washing well, I chopped the onions. Because they shrink so drastically in size when dehydrated, 1/2 inch pieces are the smallest I would aim for to keep them from falling   through the dehydrator trays. Break or chop them up into smaller pieces once dry if you wish. They can also be dehydrated in thin rings. Just keep them thin.

Place the pieces of onion in a single layer on the trays. It may seem like the onion pieces are tightly packed on the tray, but they shrink considerably within a very short period of time, so air can flow around them easily as long as they are in a single layer. It takes about 16 hours for me to fully dehydrate the onions, but time may vary depending on the dehydrator. I rotate the trays half way through. This will make your whole house smell like onions, but it doesn't last long and gets weaker as they dry out. I think that chopping is the worst part. Store them in a tightly sealed container. I usually seal mine in a ziplock baggie which I then put inside a mason jar. They will absorb humidity from the air and once they rehydrate, even slightly, they will spoil. I put more than two 1-gallon sized baggies in the dehydrators and got less than half a gallon sized baggie out. They take up much less space than frozen onions, which I love because I am limited on kitchen space. Of course, that is after keegan snacked on them as they were dehydrating. He loves onions anyway, but when dehydrated they become much sweeter.


I admit that I usually stick these in the back of my cabinet, along with my dehydrated bell peppers, and forget about them for a while. I always get so excited when I find them, though, because it is usually most of the way through the winter when I have gone through all of my frozen stores of onions and peppers. They can be used in soups, stews, chili, spaghetti, and basically everything else that you use regular onions in. It is also wonderful in dip! You can soak them in water to rehydrate before use, but I usually just put them in early on in cooking so they can soak up any liquid in the recipe. They can also be put in a food processor and turned into onion powder to sprinkle into recipes. Can't get any easier and more handy than that!


Bargain Fruit Trees

One of 3 Pear Trees
I love fruit trees! Brad bought me a couple of little fig trees for my birthday because he knew how much it meant to me to plant some. If I had it my way, my property would be planted full of them! A tight budget puts a fast halt on this idea... Fruit trees are expensive! You know, the problem with fruit trees is that the best time to plant them was always 10 years ago! If we had planted some when we moved here they would be producing fruit by now! I decided that it was time to start planting and I finally found a way to afford it.

I have always been amazed at my step-dad's ability to talk anyone into giving him a good deal on things. He can go into any store and manage to talk them down on the price of something. I was always under the impression that in most stores there is a set price. Not so! I was killing time while waiting to pick up my mother in-law, so I decided to go to some garden centers at various large super-stores. While looking longingly at the fruit trees I noticed some sad looking trees that had been knocked over and weren't in the best of health. Picking up one sad little key lime tree, I decided that it needed a home and that I would take a chance and ask about it. I took the tree into the garden center and found the manager. After surprisingly little convincing, she marked the tree 50% off! Apparently, they would rather sell it at a lower price, than to potentially lose money by having to throw it out later on if nobody wanted it.

Of course I couldn't stop there! I stopped at every garden center in the area, found sad little trees that just needed a little love, but would definitely survive, and sought out managers. I brought home 3 pear trees, 2 peach trees, a key lime tree, and a grapefruit tree! All for 50% off! I think all of the trees together came to about $65. That is a bargain for fruit trees!

It may seem that I am starting off with sick trees that won't do well, but being a biology major has its advantages. Most people want super lush trees covered with leaves and perhaps even some little fruits starting to grow. In reality, those trees won't do as well as trees that have not started leafing out yet. They are supposed to be planted when dormant so that all of the tree's energy is put into growing a strong root system. When trees are focused on growing leaves, the roots don't develop as well. Small fruits should actually be removed from the trees during their first couple of years to keep the energy focused on the roots. These sad looking little trees will actually be stronger because the leaves had died. Scraping stem with my fingernail was all I needed to do to make sure that the branches were still alive. Scratching the branch will show green under the bark for live branches. If they are dead it will be brown and dry underneath.

One of my two peach trees
I heard a saying a while back, that has really stuck with me. Don't plant a $10 plant in a $0.10 hole. I dug each hole about 1 1/2 times as deep as the pot, and a little over twice as wide. I back filled the hole with compost and soil dug out of the hole so that the top of the root ball was just barely lower than the soil surrounding the hole. I then replaced the soil, alternating compost and soil in layers, and pressing the soil in, until the hole was filled to the top of the root ball. This left the soil level in the hole about 2 inches deeper than the surrounding soil. I do this to allow water to pool in the hole so that the trees easily get enough water until they are well established. The hole being dug so much larger, not only allows the roots to easily spread, but also allows good drainage. I did this for all of the trees except for the grapefruit tree, which is more prone to getting root rot very easily, so I raised the level of the root ball above the surrounding level rather than leaving a depression for water to pool.

If I add a couple trees every year, I will soon have a yard full of them! I can't wait to get fresh fruit! My goal is to walk out of my door and feel like I am entering the Garden or Eden. I don't think it is too lofty of a goal!  I will keeping working on it and until then I will be dreaming of my Eden on Sunflower Hill.

Wednesday, June 26, 2013

CTP... Chicken Transitioning Period

Gentlemen's Club
Springtime on Sunflower Hill Homestead, as with many homesteads and small farms, is a time when new babies are introduced. There are sweet fluffy little babies everywhere! Mid-summer (yes... I know by the calender summer just started, but it seems to have been here for quite a while!) is a transitioning period. This is the time when chickens are nearly full grown. The roosters are crowing... and fighting... and crowing. It is time for a trip to freezer camp here on the homestead. Our rooster pen seemed to be getting smaller! The boys were getting pretty big! I am an animal lover, which is why I process my own poultry rather than buying from large factory farms, but it is difficult for me. I know my birds were raised with the utmost care and had good lives and fast, easy deaths. The meat is far superior to anything store bought, as well! Brad and I put 21 chickens in the freezer last week. About half of what we did last summer, but I am considering a 2nd batch later this fall.

Sandy the Easter Egger had to check
out the camera :)
Now that the roosters (most of them anyway) have gone to freezer camp, the hens need to be transitioned to life with the grown-up chickens. I moved their hoop coop next to the hen house to allow them to get used to being in that area for a couple days. I would have kept them there longer, but there is no grass in the immediate area surrounding the hen house. Last night was their first night in the hen-house. We put them in at dusk, after the others had settled down. After a few minutes of loud fussing, without any actual fighting, they all settled down on the roosts.

Today is their first day free-ranging. I am as bad as a nervous mother on her kid's first day of school... I hope all goes well. The Easter eggers, Cochin, Brahma, and Leghorn are large and I'm not quite so worried about them. The leghorn, brahma, and one EE (Sue) have been following the older hens and rooster around and seem to be loving it! The Hamburgs are tiny, but are supposed to be really good at free ranging because they are fast. Brad calls them the "road runners" and his description isn't far off! They have been sticking fairly close to the hoop coop, but wandering a little farther than many of the others. I am most worried about the Silkies. I really hope that despite their size, they do alright. One silkie hen had a "haircut" before she went up for the night to allow her to be better able to see anything that may try to eat her on her first free-range adventure. Most of them have been hanging out inside the open hoop coop that they have lived in for so long. I have been keeping a close eye on them. I'm not sure if I am more worried about a hawk attack, or that my foster puppy "Logan" will decide to try to play with the pretty new birdies and they won't know to keep an eye out for him. So far he has discovered that he likes to run at the birds to make them scatter every once in a while, but he hasn't actually caught and hurt any of them. I sure hope it stays that way! Hopefully it is just my worrisome "mother hen" nature running a muck and all goes well. CTP can be a hectic time on the homestead! Fingers and feathers crossed!

Blueberry Pickin' Time


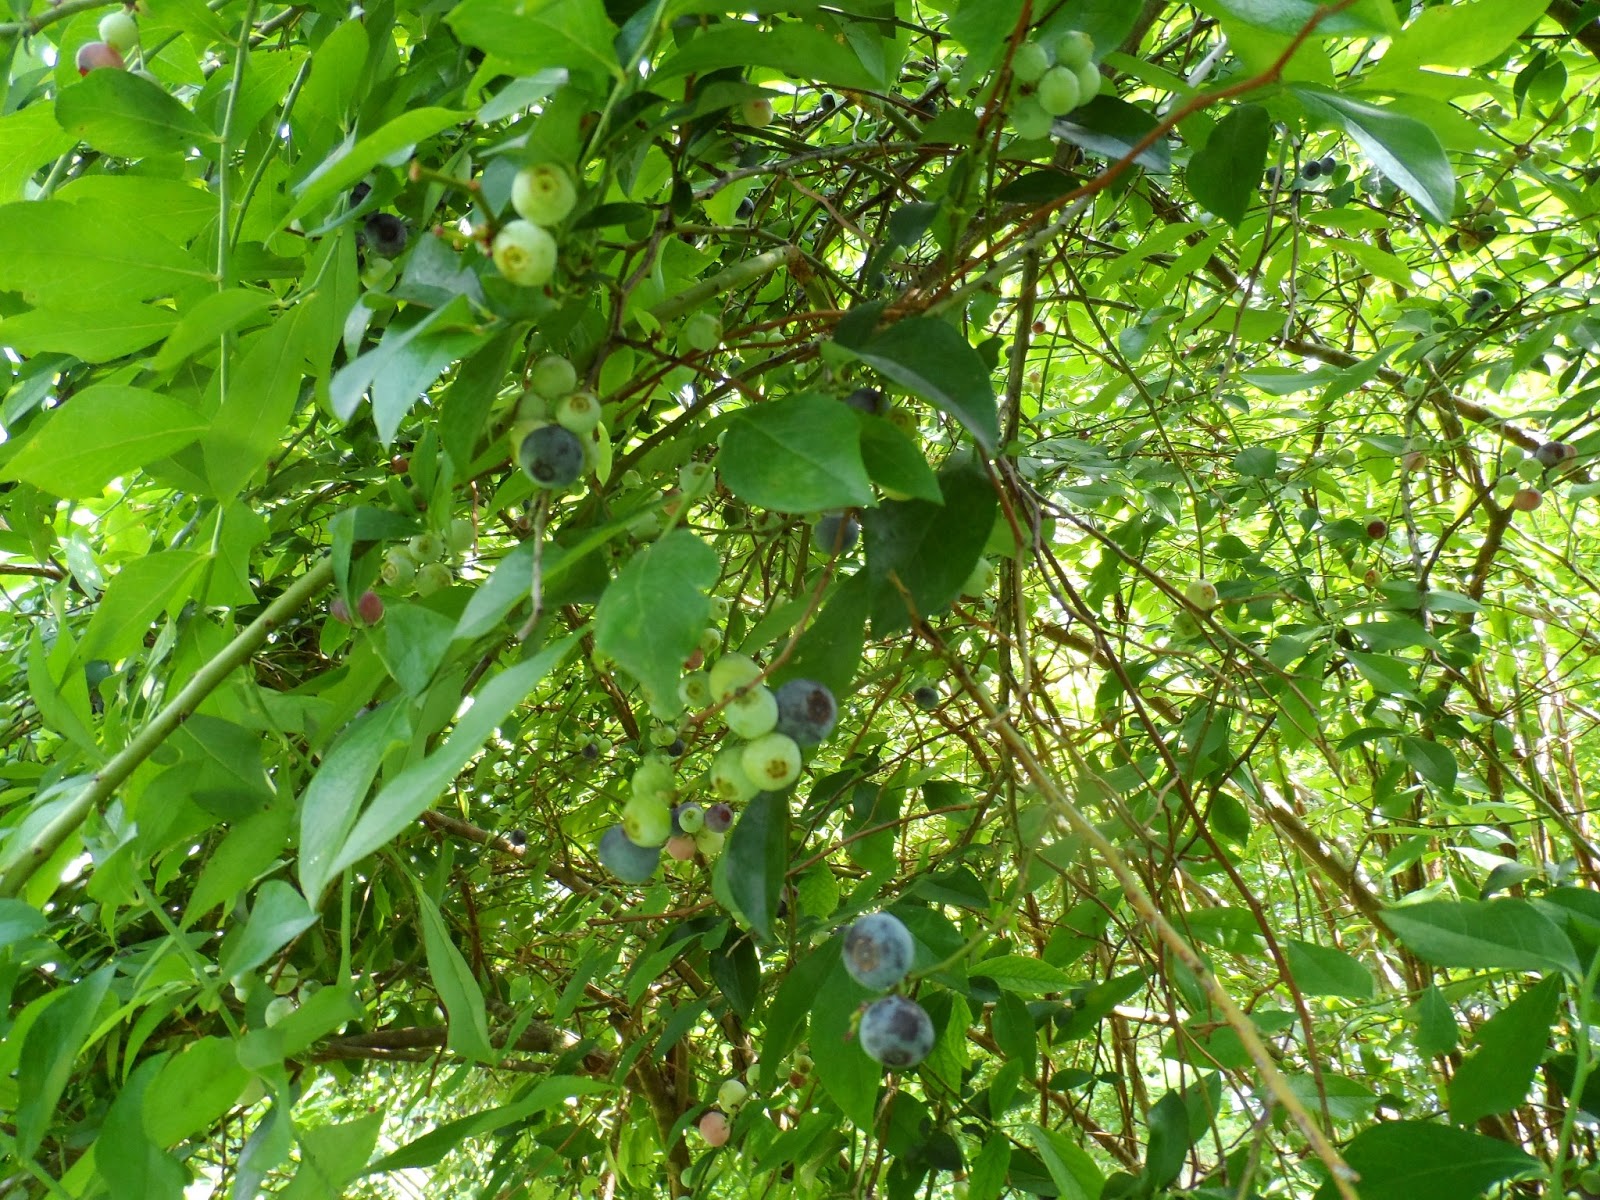
It's that time of year again! The hot humid time in summer when the blueberries need to be picked. We try to pick them every other day so that the berries continue to ripen rather than having a sea of green berries covering the ground under the bushes. The bushes will drop unripe berries if not picked properly, or so has been my experience. The birds usually do a good job keeping the blueberries picked if I don't... I am willing to share some but not too many! While blueberry picking can be peaceful, being outside at this time of year isn't usually too comfortable. It is hot during mid-day and the biting bugs come out at dawn and dusk. The trick is to try to pick them faster than the bugs can cover you in bites. I'm failing miserably so far this year! I attribute it to the good pruning I gave the bushes last fall and timing the fertilizer right this spring. They are producing like crazy!  I try to give them a good dose of fertilizer right as they start to flower, but don't always get to it in time. The rain has been very cooperative this year as well. We have given the bushes 3 good pickings, each taking about 2 1/2 hours. So far we have put 3 gallon sized bags of berries in the freezer and today we got a 5 gallon bucket about 3/4 of the way full. Not bad for 2 large bushes! There are 5 or 6 smaller ones, but they aren't producing much yet and because they are short, the chickens and turkeys steal the berries before we get to them. I never knew chickens could jump before I saw mine discover blueberries. They are hopping all over the place! Its so amusing to watch that it is almost worth allowing them to steal my fruit!

5 Gallon bucket nearly full of berries <3

 The berries are so sweet and juicy! Its difficult just to get them into the bucket instead of them ending up in our mouths! I think that Keegan eats more than he puts in the bucket! I'm looking forward to making blueberry jam, blueberry habanero pepper jelly, and blueberry cobbler, just to name a few things! We may end up with more blueberry wine this year, and I would like to try dehydrating them for trail mix as well!. It is always nice to have some in the freezer for pancakes and muffins later in the year. There are usually never enough berries for everything I want to do with them, but this year may be a first! We will see. Now to get them all picked and put up!


As always, the turkey-heads are nearby. Just in case I might drop a few. Always willing to help!

Friday, June 7, 2013

You-Pick Farm

Some of the You-Pick pepper rows

Our little family has developed something of a tradition in the few years that we have lived here. Every year at the beginning of summer, we load into the car and head to the you-pick farm. I had never heard of a you-pick farm before moving to this area! I realize now that they are pretty common and that most areas probably have at least one within a reasonable driving distance. Ours is about 45 minutes away. That seems a long distance to drive but with the amount of produce we pick we would have to drive back and forth to the nearest grocery store many times. It also cuts out on all of the gas that would be used to transport the food to a sorting facility, warehouse, and then to the store. It also saves money because you cut out all of the middle men. Nobody has to pick it for you, sort it, transport it, stock it, and sell it. You also don't have to pay for all of the produce damaged and destroyed during that process, or the hiked up price the retailers have to charge to make a buck. Best of all, it is a wonderful day spent out of doors with family. My son really gets into it and enjoys finding the biggest, most perfect, or largest amounts of whatever we happen to be picking at the moment. Family time happens too seldom and this is a perfect chance to start a tradition!

People enjoying the sunflowers and peppers
One of the two buckets we picked of onions
We always have an ever expanding garden, but I am always getting it started late so I have nothing producing right now. That just makes me yearn for fresh seasonal produce all the more! No need to wait and I don't even have to settle for tasteless grocery store produce.Those that don't have the time or space to have their own garden can benefit from these farms even more! You-pick farms grow all of the food and then you simply go and pick it. You get the freshest produce available, since you are the one that actually plucks it from the vine. You can also choose exactly what you want. Do you prefer the little tiny potatoes or the giant baking potatoes? Would you rather have ripe red tomatoes, the less ripe ones that will keep longer and ripen in a window sill, or perhaps green ones to fry? How about some of all of them to use for every occasion? No problem. Ours charges per 5 gallon bucket. Anything you can fit in the bucket you get for that price. This year it was $10 a bucket, which seems steep, until you really think about it. Bell Peppers at the grocery store generally cost about $1 each. You can fit FAR more than 10 bell peppers in a 5 gallon bucket. Tomatoes are usually priced per pound. I can tell you for sure that there was more than 10lbs of tomatoes in that bucket! My shoulder is still reminding me of that! My favorite is the onions. We use lots of onions! 

The tomato field. Tomatoes as far as the eye can see. I
imagine this is what part of Italy looks like LOL
The facility also picks some veggies and has them at the front to buy. Things that aren't producing as much at that time, come from more delicate plants, or aren't as easy to pick are usually kept that the front, along with some of everything on site for the people that aren't able to, or don't want to, pick their own. I was so proud of Keegan. He was really into finding ripe tomatoes in the sea of green ones. When an elderly couple came and was not able to find any ripe ones, he found the beautiful red tomatoes for them. When he had filled their buckets and we were turning to go the man asked Keegan how he owed him. Keegan declined and instead gratefully took a cold bottle of water that they offered him. Something more wonderful than even a sea of beautiful veggies: priceless moments like that and the pride a mother feels when she sees the kind and responsible young man her son is growing to be. 
Big beautiful tomatoes fresh off the vine!

Our haul :)
We headed home in a wonderful mood and with a backseat FULL of bags of veggies! I couldn't wait to start putting these treasures away when we got home. Brad and I took turns dicing bell peppers. We use them in just about everything so we go through a lot and it is nice to have a stock of them already diced on hand. We ended up filling three gallon sized freezer bags with peppers for the freezer, and then I dehydrated two gallons. They take up so much less space when dehydrated! What would fit in a gallon sized bag before the process, will fit in a snack sized bag afterward. Then when added to water will rehydrate! We had just about finished our stock of dehydrated peppers from last year so it was perfect timing! I also dehydrated a couple of red onions I diced. We haven't even started putting the many types of hot peppers we picked away yet. While Brad was taking his turn dicing I was blanching and skinning tomatoes and dicing onions to make spaghetti sauce. I used all of the ripest tomatoes in the sauce so that the others would keep for a few days. We had some tonight over spaghetti squash that we also got from the you-pick. It was worth the effort! The onions will keep for months after setting in the sun to dry for a day or two. The yellow onions will keep the best that way as long as they are in a cool, dark, dry place. I usually hang them in a cloth bag so they get good air circulation. The red and white onions won't keep as long and will be used first or will be dehydrated or frozen before they turn. What I am looking forward the most is the sweet golden corn on the cob. It is amazing grilled. All you have to do is throw the whole ear on hot coals, sheath and all. Turn a few times and viola! The sugars caramelize, and the sheath steams it. Just peel and eat!   

$10 worth of fresh tomatoes nestled around my incubator.
Yeah... I think that is worth $10! 
You-pick farms are a wonderful idea! You can find everything from blueberry you-picks to cutting flower you-picks, to you-picks that carry everything imaginable! It is such a wonderful way to eat locally and seasonally. It is also wonderful to be able to see where your food is coming from. An important thing to remember, however, is that just because you pick it and it is local doesn't mean it is organic and pesticide free. You should still be careful and wash everything before you eat it. An amazing thing, though, is that you can actually talk to the farmer and find out what, if anything, is used on the crops. Who would know better than the person that grew it? I can't believe that I never knew of you-pick farms before! I look forward to going all year now. I hope that more people will look into their local farms and see if there is a you-pick near you! Some great websites to check are pickyourown.org and localharvest.org. Also keep an eye in the newspaper or ask around at the local farmers market! Happy Picking!


Sunday, May 5, 2013

Spring Cleaning the Hen House and New Perches

Nice clean coop with new perches <3

It rained for days. A steady heavy soaking rain. I thought it would never end and was getting ready to start building an arc! Thankfully the rain finally stopped and the sun came out. I am so thankful to see the sun! The animals around the homestead are too. The chickens and turkeys have been happily clucking away and looking for bugs. They have been soaked and pathetic looking for days. I am always inspired to get things clean and new after long rains. The rain cleans everything outside and makes it new, so it only seems fitting.

The chicken coop is mostly water proof, but it has large windows to help cool it during the miserably hot summers here, and so when the wind blows the rain comes right in. I use the deep-litter method. I clean the coop out about twice a year and then just add pine chips when needed in between cleanings. It works wonderfully! Because pine chips are added fairly frequently, the chicken poo dries up and there is no smell. The only time it smells is when it gets wet, which it definitely did over the last few days. It was nice to get it cleaned out.

Compost out of the bottom (ground) level of the coop.
My garden will LOVE this!
I don't go all out when I clean the coop. I don't spray it out or use cleaners. Chickens poo and it tends to get on stuff. That's life. Moisture is what makes it icky, so I don't like adding more moisture to the system. I also don't like using chemicals in my own house because it isn't healthy, so I don't see why I should use them out there either. I use vinegar to clean out the feeders and waterers periodically, but that's about it. My chickens are happy and healthy, so I assume I am doing a good job. I push my wheel barrow over to the coop and use a gardening hoe to pull the shavings out into the wheel barrow, which are then emptied into the compost pile. When I am done with the top of the two level coop, I shovel out the bottom level. The bottom level is directly on the ground. The chickens end up scratching a lot of the pine shavings down to the bottom level, which start to decompose because they are in contact with the dirt and all of the wonderful microorganisms living there. I end up with some beautiful compost! My garden will love all of this black gold!

After all of the shavings are cleared, I use Hi-Yield to dust the inside of the coop. It can also be used directly on chickens, pets, livestock, or veggie plants. It has the same active ingredient as Frontline and kills pests such as lice, fleas, and ticks. Like I said earlier, I don't like using chemicals. I feel better about using this than Sevin-Dust on my animals though, which is what many people use to rid chickens of lice. I put it in a sock and plop it around on the floor and the walls and then cover it with fresh pine shavings. It is also easier to dust the birds like this. I have heard of putting a chicken in a bag up to its head, putting some dust in the bag, and then shaking it. It cracks me up just thinking about it. I prefer to shake-n-bake my chickens when I am eating them, not when I am dusting them. My roosters would never forgive me for embarrassing them like that in front of their ladies!

I took out the automatic feeders that I built last year. Water kept getting inside of them and molding the feed. I much prefer the round red feeders. The chickens and turkeys can all gather around it at the same time. More feeder space with less space taken up by the actual feeder. The automatic feeder had apparently looked like a good place for a momma mouse to have babies. The chicken and turkey hens got them the second I moved the feeder. I hate to kill babies but I don't want mice living in my chicken coop and apparently the hens were fine with taking care of that problem for me. I put a thin layer of pine shavings back in the bottom and filled the top up. Much will be scratched back to the bottom level, and I will keep adding more to the top. It will be cleaned again in the fall when I start getting everything ready for winter.


While I was working in the coop, I decided it was a good time to add the perches that I have been meaning to add for ages! Because the new hens are going to be added to the hen house in the next few weeks they will need a place to roost. I thought about using 2x4s but prefer to give them something round. It seems like it would be more natural and comfortable on their feet. I raided my bonfire pit and cut up limbs that looked to fit the bill. I nailed a 2x4 onto the floor of the coop, approximately at mid width. Then using one of my favorite "tools" I zip-tied them together to form ladders. The 2x4 keeps the base of the ladders in place, but will allow me to easily remove them for cleaning. Einstein and a couple of the ladies were trying it out already when I went to check on them for the night. Hopefully the new girls will have plenty of room to roost when they are added to the flock!


While I am on perches, I never mentioned what I pulled together for the turkeys a couple months ago. They enjoy their roost too, which unlike the chicken roosts, is made of 2x4s. I basically made a saw horse.  I have had to reinforce it a couple of times because the turkeys are very heavy and once it starts leaning it topples over! Most of them enjoy perching on it at night, although some still insist on sleeping on the ground. Can't please everyone!

Wednesday, May 1, 2013

PVC Hoop Chicken Tractors

PVC Hoop Chicken Tractor with Automatic Waterer
I finally put the finishing touches on the newest chicken tractors. As with all of the others, these are a definite improvement over the two that I built last year. One of last year's was super sturdy, but must weigh 300 lbs, and is very difficult to move. I've started just calling it "The Tank". It is our brooder tractor. The other was very large (20ft L x 14ft W x 7ft H) and very light for its size, but was not very sturdy (Hoop Coop). That one has been placed in a permanent spot and the turkeys live there now. The new hoop tractors are both sturdy enough to hold up to being moved AND are light enough to move around easily by myself! The main change I have made to these other than the size, as opposed to the turkey hoop coop, is that I added a wooden "spine" to it and thus had to place the doors to the side rather than in the middle. This adds so much more stability! The turkey hoop coop has a pvc "spine" and keeps trying to collapse like an accordion. I need to add a wooden one to it in the near future to stabilize it.

The new hoop tractors are also fairly large (10ft L x 6ft W). The main issue I have found thus far is that they are just a tiny bit shorter than I would like. I'm tall, and they are just high enough to make it impossible to walk in bent over so I have to bend and crouch, which results in more of a waddle than a walk. The chickens seem to be really enjoying them! I have separated the roosters into one and the hens (as well as the st. run silkies, and the 3 emergency brooder babies who are smaller than the rest, 2 of which are roosters) into the other. There are around 21 chickens in each one. They are not super predator proof, as I only used chicken wire on the bottom and deer netting on the top. I built the large hoop coop the same way. I keep them close to the house, though, and so far I haven't had a problem. The dogs do a pretty good job chasing most animals off, and alerting me to the rest. Honestly, other peoples' dogs have been my biggest problem and they can get through almost anything if they want to badly enough.

Moving the chicken tractor made easy with PVC
 I move them at least once, by try for twice, a day. They are pretty light so moving them sideways is simple. I have attached a short rope to each end and just lift and slide one end over, and then do the same to the other. Moving them backward or forward is a bit more difficult when just dragging with the rope. Luckily, when moving "The Tank" around I figured out a trick. Watching all of those documentaries came in handy! Ancient peoples used logs to roll heavy stones to where they needed them. That is how the druids built Stonehenge and the ancient Egyptians built the pyramids. I use large width PVC instead of logs, but the idea is the same. Just pry the coop up, stick PVC under it in a few places, roll the coop, and when a piece pops out the back take it around and put it back in front. It was really difficult for Brad, Keegan, and myself, to move "The Tank" together by lifting or dragging, but I can move it by myself by rolling it! These coops just take a piece on either side, and only to make my life easier. I have dragged them from one end of the yard to the other by hand, but I didn't like the blisters the rope gave me.
The lil' ladies' new automatic waterer
Close-up of the automatic waterer fittings

The newest addition to the new chicken tractors are the automatic waterers. I built a wooden frame onto the top to hold the bucket securely when I am moving the coop. I put it in the front so that I can easily dump and clean the bowl. The bucket being on top allows gravity to provide the pressure for the water flow. I added a quick disconnect and shut off valve to allow me to easily remove the bucket and clean it. It really isn't needed though, as this type of waterer already has a quick disconnect which stops water flow, at the bowl. It is so much easier to fill the 5 gallon bucket once every day or two, than refilling waterers at least twice a day and then worrying about them being out of water. It has already been getting pretty hot and the summer's heat is really going to be dangerous. I like that I can add ice to the buckets to cool the water when it gets really hot, as well.

The tractors have been in service for about 2 weeks and the waterers for 2 days. I am very happy with them so far. Hopefully they will stand the test of time.