 |
| My new garden (2011) I had forgotten how sad, dead, and desolate it looked just last year! I have worked a lot on cleaning the tree line up and getting the grass to grow in the yard, as well as on the garden itself. It is AMAZING what a year can do! |
 |
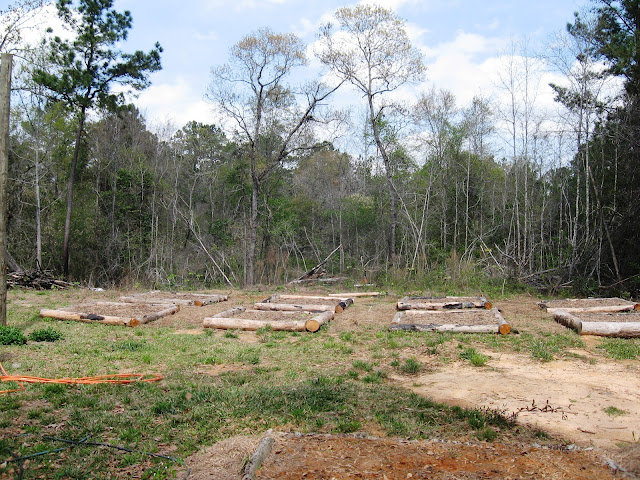
| The small garden and the new faucet I installed near the garden. THEN (2011) |
 |
| and NOW (2012) |
Along with the chickens, turkeys, and blueberries that I have been busy with, I also have a veggie garden (among my other gardens). I started out with a typical garden. The soil was tilled and seeds were planted directly into the ground. Unfortunately, nothing grew very well like that. The soil got compacted quickly because people were walking on it while tending to the plants. The soil, itself, was poor, and consisted mainly of red clay. The topsoil had been bulldozed off along with the trees that were standing there shortly before we moved onto the property. Hence, it was sitting in large piles along with the remnants of the trees. It is really difficult to amend a whole large garden's worth of soil! When the garden was watered, the water just puddled up in some placed, creating large bogs, and ran down the hill in others, creating huge ruts. Something had to give... One of the large piles of trees and soil that had been bulldozed where still in good condition, and were stacked neatly on top of each other. I measured 6 foot sections of the logs(except for two- 11ft and two-8 ft logs for the tomato garden), Brad cut them (as, while he lets me do most things, he won't let me use the chainsaw... pout), and we hauled them up the hill. My son, Keegan, and I measured 4 foot walk ways and laid the 6 foot logs into squares. Once the logs were placed into 8 perfect squares with pretty little walk ways running between each, and one 11ft by 8ft rectangle, I began putting the topsoil to use. I filled the beds by hand (this took a couple weeks of steady work as the topsoil mound was at the bottom of the hill and I had to transport it using a wheel barrow and a shovel) and made sure not to pat the soil down. The beds were then, officially, "No Walk Zones". The soil never has to be tilled or turned over if it is never compacted to begin with. Several inches of cow manure mixed with hay were placed in each bed and allowed to age and compost was added. Even with all of this work, last year's garden was not wonderful. This year it is amazing, though! At the end of growing season I put hay and chicken manure onto the garden, as I clean out the coop, and allow it to age and decompose over the winter. In the spring, when I plant my seeds, I add compost and then cover the garden beds with clean hay, leaving only the small area where I plant each seed slightly exposed. The hay is thick and keeps weeds from growing, as well as keeping moisture in. This spring I added an irrigation system. It still needs a bit of work, but has cut down the time I spend watering the garden drastically. I cut two 50ft drip hoses into fourths. Trenches were dug between each bed and pvc was laid. Reducers were placed on each end and attached to a drip hose with a metal clamp and pvc cement. The drip hoses were run around each bed and the pvc was buried. The two rows (each row has 4 beds) were connected via a hose splitter, and a main hose is connected to the faucet. All I have to do now is turn the water on and all 8 veggie bed water themselves while I water the tomatoes, strawberry patch, blueberry bushes, flower beds, and herb pots by hand with separate hoses.


No comments:
Post a Comment