 |
| Home-made emergency incubator |
 |
| First pip! |
 |
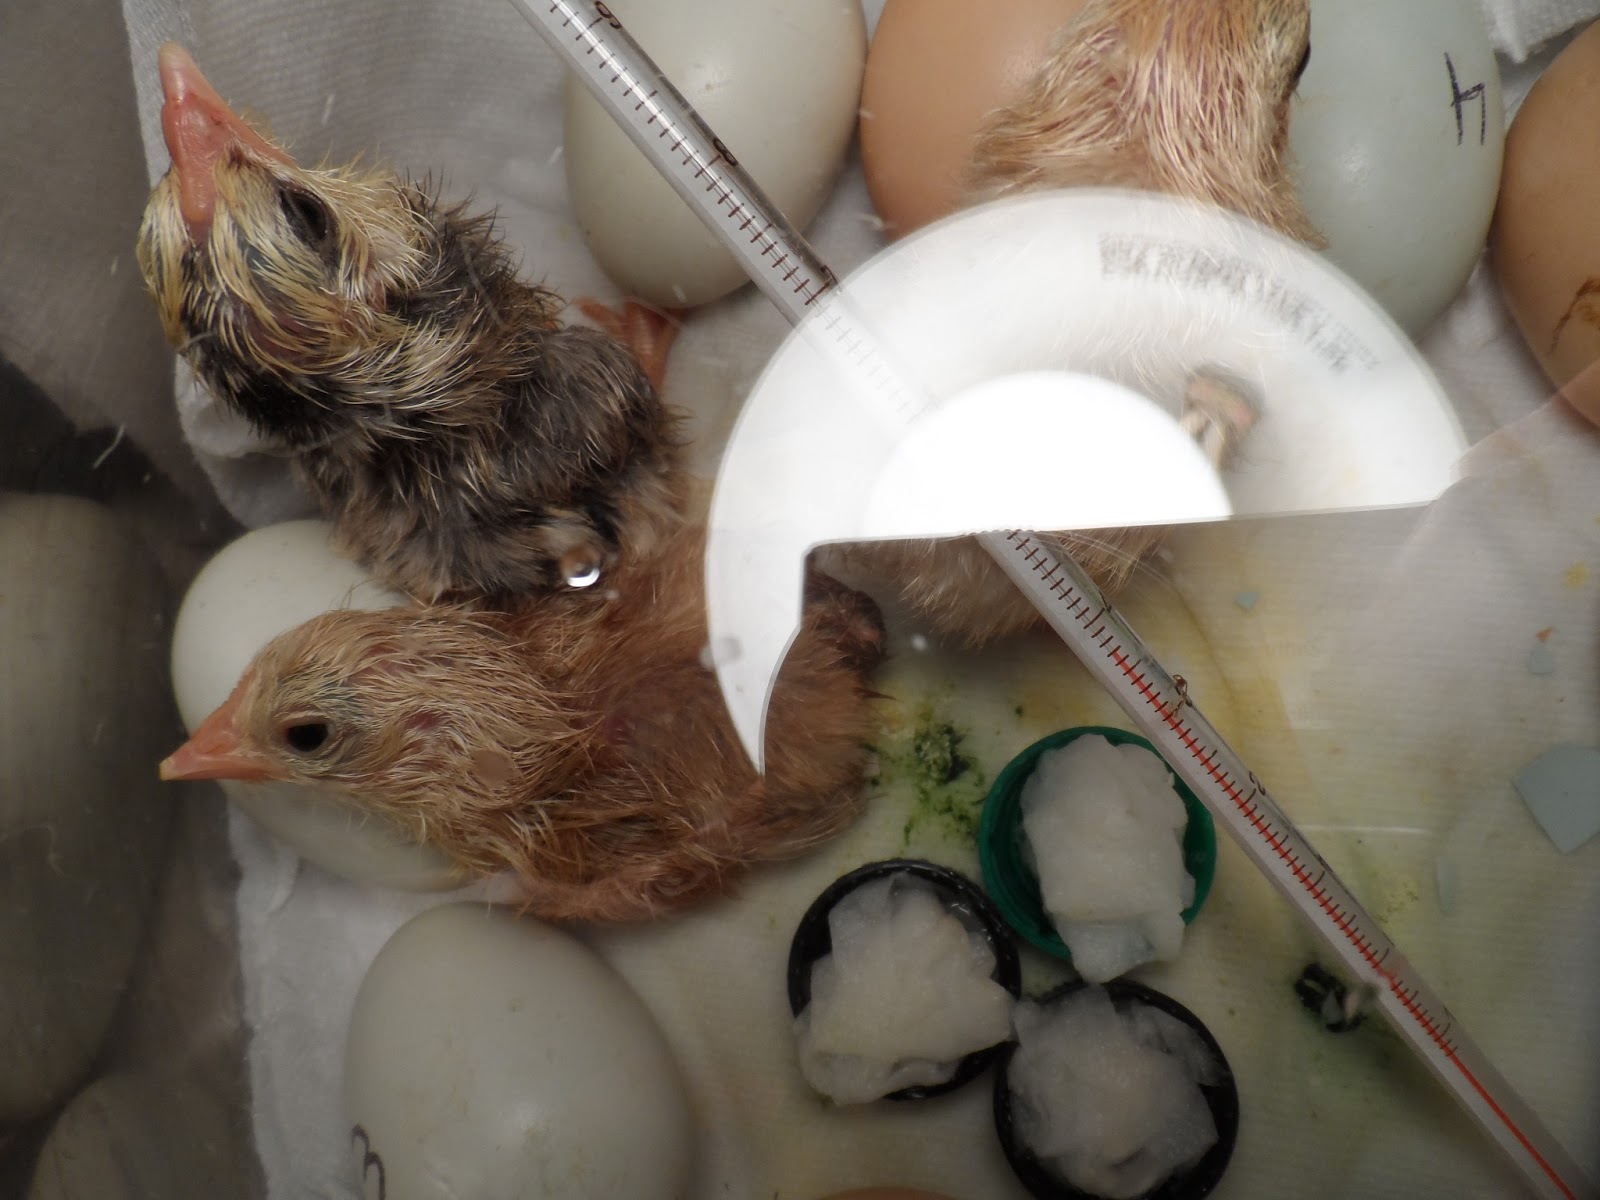
| The first baby fluffing up |
About a month ago I was having a really difficult time keeping one of my hens from sitting on every egg she saw. I only have time to collect eggs in the evening when I get home from work some days, and I really didn't want her sitting on all of them in the meantime. I decided to number some eggs and put them in the nesting box for her so she would leave the rest of my eggs alone, and because I am always secretly wishing for more fluffy butts. :) She sat on them all night and then for an hour or two during the day, then she would leave the nest and play with her friends. Oh well, at least she wasn't sitting on all of the eggs I planned to eat or sell. After about two and a half weeks I decided to candle the eggs, just to see. It turned out that there were actually babies inside! They were due to hatch on the 21st... nothing. After another week I decided to dispose of them before they turned rotten and exploded. I am always paranoid and decided to open one up just to make sure I wasn't committing mass murder, and sure enough, there was a poor little baby inside it. I was heart broken to have killed the poor thing. The eggs stayed in the nest. After a total of four and a half weeks, after putting the eggs in the nest, I found a poor sad little chick, still wet, but dead in the nest.
 |
| Come on guys, you are almost there! |
I took a large soup pot lined it with paper towels, and wrapped several bath towels around it. I put wet paper towels into soda caps to keep the humidity up but the bottom of the incubator dry. Next I put a thermometer in it, a sheet of plexiglass over it and set a desk lamp with a 60 watt bulb over it. I made sure the temperature was regulated by moving the lamp up and down until it stayed at the 37.5 degrees Celsius (99.5 Fahrenheit) and didn't change. Finally I went and got the eggs, making sure not to turn them, and placed them in the incubator in the same position that I had taken them out of the nest.
 |
| Wow, hatching is hard work! He somersaulted out of the egg, landed like this, and laid there for several minutes. He needed some rest! |
New Hampshire Red X Easter Egger cross. I am so excited! There are 3 more eggs that are numbered and haven't pipped. I'm not sure if they will hatch, but I am leaving them for a couple more days just to make sure. She didn't exactly sit consistently.
Several more were laid after the original batch was put in the nest, so I am still hopeful that they will make, it will just be in a week or two. I have learned that I should always have an emergency incubator on hand just to make sure, but I am overjoyed that my little thrown together incubator worked! My real incubator came in the mail today. It will soon be loaded with turkey eggs!
 |
| All three babies hatched, and proceeding to fowl... uh, foul the incubator. |
 Because I only hatched 3 babies, and they are so much smaller than the babies that are in the chicken tractor brooder, I had to improvise a make-shift brooder as well. I used a large canning pot (they were hatched in a soup pot, right? May as well stick with the theme!), lined it with a plastic bag, filled it with pine chips, and connected another desk lamp to the side. Note so self... I really need more desk lamps. Apparently they come in handy. And more thermometers too! I am nearly out! Anywho, The problem with the canning pot was that I only have large waterers and they would take up the entire place. I used a 20 ounce soda bottle, lid removed. Wrapped some sturdy wire around it tightly, so the bottle won't slide up or down. turn the bottle upside down and bend the wire to make a hook. I filled the bottle with water and chick nutrients, turned it upside down into a small bowl, and hung the bottle over the side of the brooder with the opening of the bottle about 1/3 of the way into the bowl. Once the water fills to the opening it will stop. When they drink it will automatically refill to that point. Love it!
 |
| All fluffed up and in their brooder <3 |

Wow, AMAZING SAVE! Well done. They're so tiny. ♥
ReplyDeleteThanks for linking up with the Clever Chicks Blog Hop!
Kathy Shea Mormino
The Chicken Chick
http://www.The-Chicken-Chick.com
Thanks for sharing your experience. Many people use egg incubators to hatch a variety of eggs. Your tips will make it easier for many readers to find the easiest way to hatch eggs.
ReplyDeleteYou mentioned on my blog that you had the same incubator as I have bought, and that the temp seems to be a bit high, what temp was showing on your incubator when your digital thermometer was reading the correct temp?
ReplyDeleteI honestly don't remember, I'm sorry! I'm pretty sure it has more to do with the computerized thermometers and the temperature regulation that he set up to go with it. I am unsure of whether he calibrated the thermometers too high (he is positive he didn't) or if the whole system to too tightly regulated and there isn't enough of a cool down period at any point in the cycle. It keeps the temperature almost perfectly stable. Perhaps the temperature should be a bit lower to be that exact? I have had my hands full with my youngest son since he was born and haven't attempted to hatch anything to test the system in a couple years. I wish I could be of more help!
DeleteExcellent info here, I am currently doing some research and found exactly what I was looking for. Thank you!
ReplyDeletenice
ReplyDelete