Wednesday, March 20, 2013

Shipping Hatching Eggs

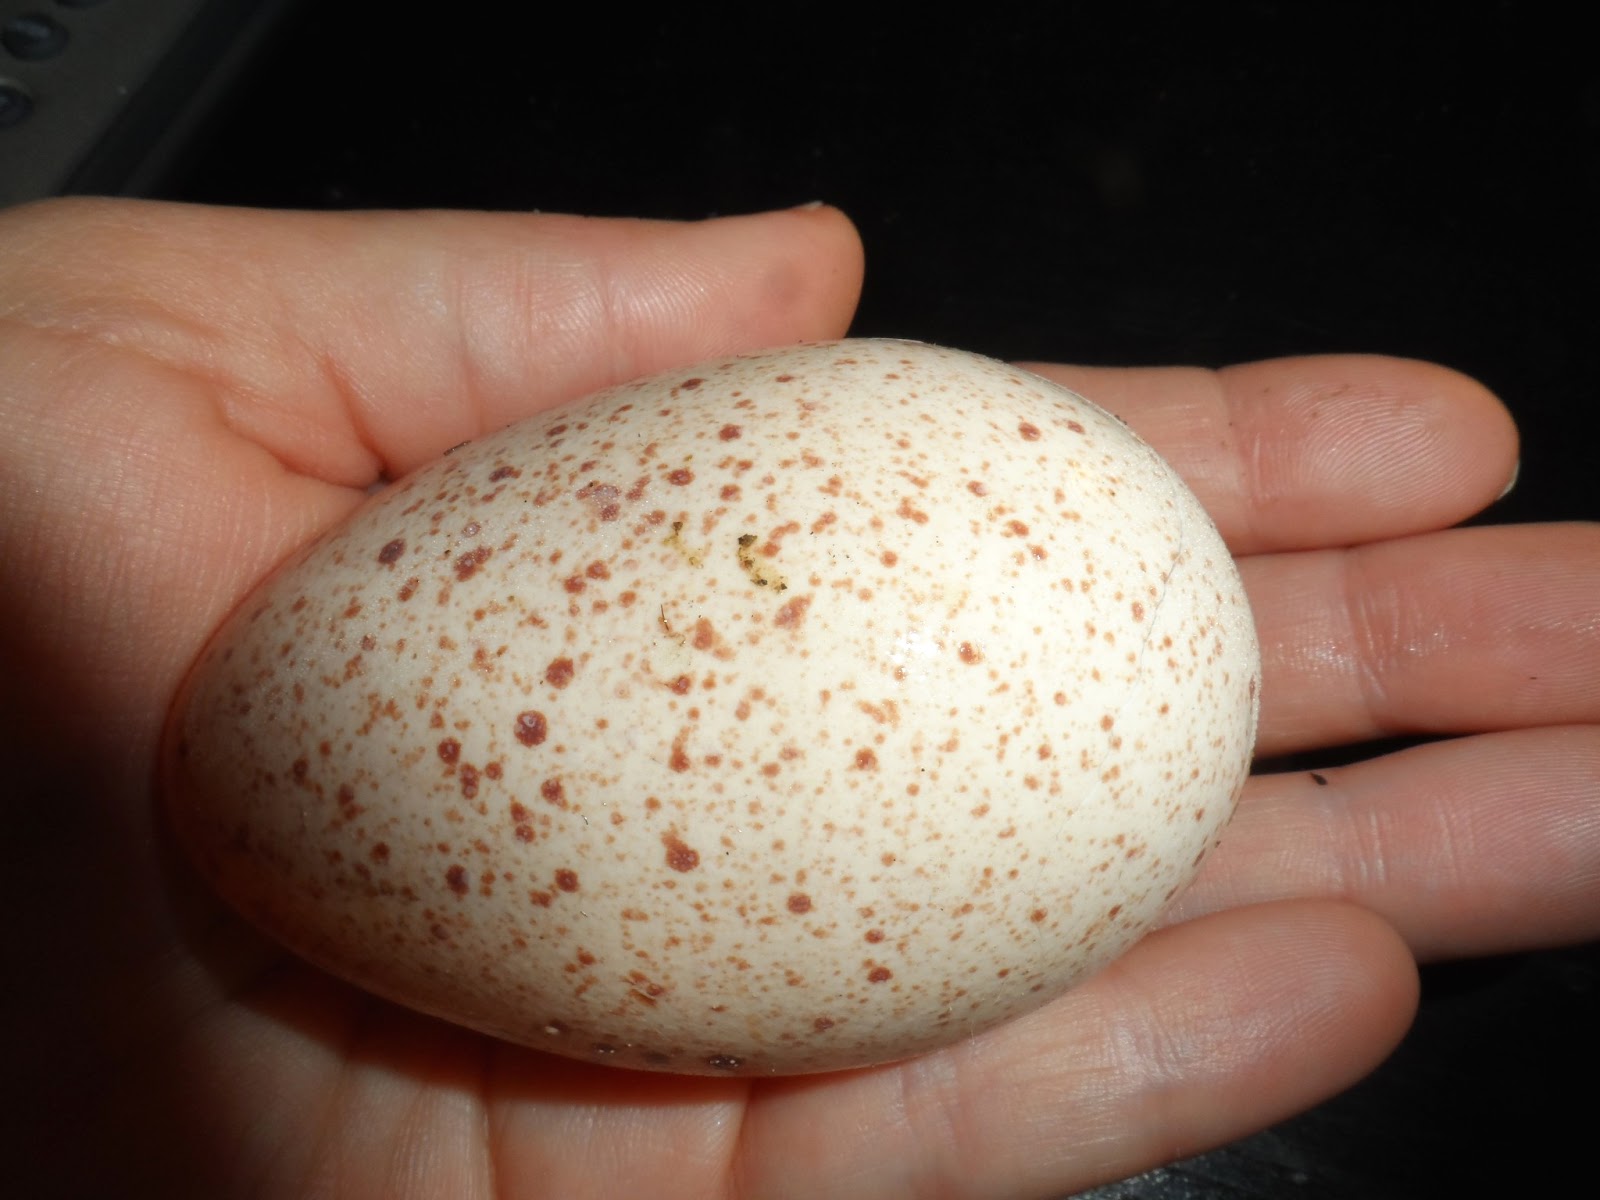
I sold my first hatching eggs! I had not gotten my incubator ready and I really wanted to separate the Bourbon Reds from my last two Blue Slates so I could try to increase my breeding flock, but I really hated to waste perfectly good fertile eggs. I thought that surely someone would be interested in them, so I listed them on the local poultry swap Facebook page. I didn't have high hopes that anyone would want to buy my mixed breed turkey eggs, but figured that someone local would at least save money by not having to pay shipping. The response was amazing! And most of them lived several hours away and were willing to pay for shipping! My sweet little turkeys have always been impressive to me and people would have thought that the eggs were made of jewels or gold as excited as I have been about them, but I was a bit surprised to see that others shared my point of view. I have a waiting list of people that want me to get in touch with them when I have more eggs or when I hatch out babies. I'm kinda worried that I might not get any of my own! I'm going to have to put some in my incubator as soon as I get them separated before I sell more because I don't know how long they will continue to lay.

I made sure that the buyer knew the risks of shipping eggs. The USPS is the only service that will ship hatching eggs and they are not always the most gentle with packages. It makes me a nervous wreck when I order chicks, but they are loud and make it difficult to forget that the package is fragile and needs to be processed quickly. Even so, I had a box of chicks lost in the mail last year. I called everyone I could find a number for, eventually getting in touch with the person in charge of postal service for the entire state. By the time we located them and they were sent on to me they had been in the mail for more than 3 days and over half of them were dead. The hatchery was wonderful and gave me a full replacement, but it didn't make me feel better about all of those poor chicks dying needlessly. Loosing or smashing the box aren't the only things you have to worry about when shipping eggs. Temperature fluctuations, shaking or jarring of the box, and even turning the box upside down for long periods are enough to damage the eggs and make them unhatchable. The air cells in the eggs need to remain intact. Even if the eggs are not cracked or broken, the contents can be scrambled inside the egg!

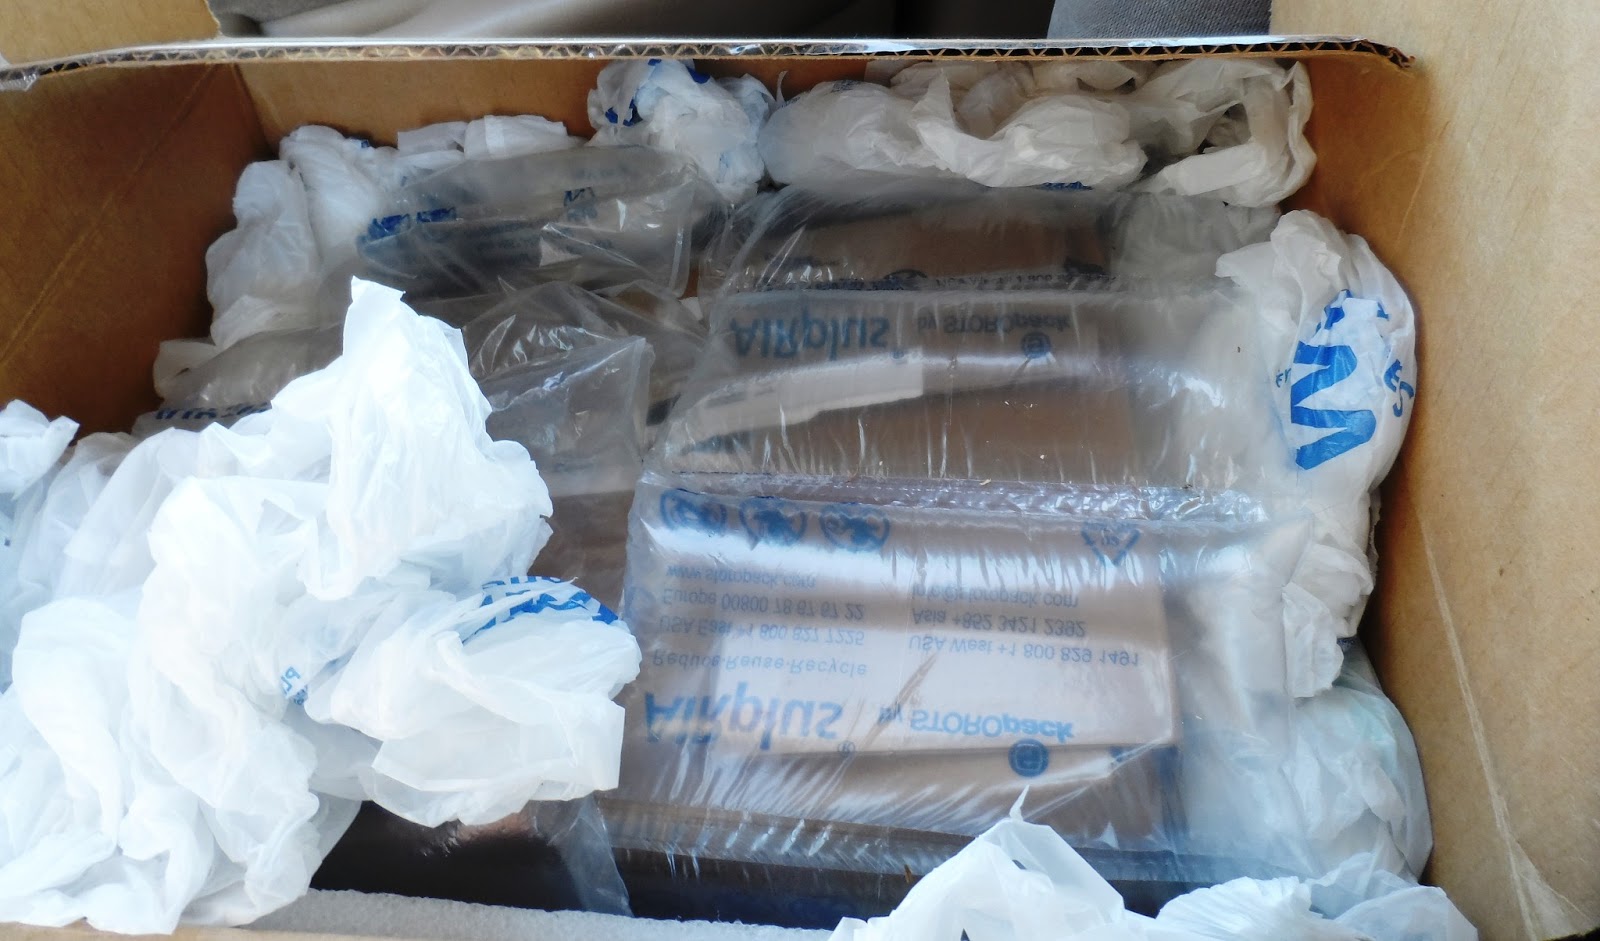
I went to extremes to ensure that the eggs arrived in one piece. I found a small box that all of the eggs would fit in with about twice the amount of room than the eggs would need. I padded the sides and bottom of the box with foam. Then, I wrapped each egg in a sheet of bubble wrap and taped it. The wrapped eggs were placed on their sides (I figured that it was more likely for the USPS to turn the box upside down than sideways, upside down would disrupt the air sac). After covering the wrapped eggs with another sheet of foam, I taped the box up well. I wrapped that box in a larger sheet of bubble wrap and placed it inside a larger box that had been lined with crumpled up shopping bags (I hate paying for something that gets thrown away when I can reuse something that would have been thrown away or recycled, anyway!). I padded the entire box with the crumpled shopping bags so that there was no movement of the inner box and I felt that it would add enough of a bumper area, including the top of the box. I then took the box to the post office and had them tape it closed really well for me. I wrote on the top and all four sides that the contents were fragile and that there were live embryos in the box. The postal worker told me that it is actually illegal to ship live embryos, so I made sure I added on the outside of the box that they were hatching eggs. I wanted to make sure that they would not X-ray the package and damage them in any way. I had them shipped express and asked them to hold the package at the post office, rather than having it ride around even longer, on potentially bumpy roads, with the postal worker, and the have it delivered in conditions that may not have been favorable. I put the customers phone number on the box and wrote that they should call her on arrival.
 Because there was tracking on the box, I knew when it had arrived at the post office. I texted her and made sure that all of the egglettes had arrived and she was happy with her order. She said they all made it in perfect shape, and that her and her children were really excited about hatching turkey poults! Of course, they could be internally damaged and it not show on the outside. Unfortunately, turkey eggs are really too thick to candle, so we won't know for 28 days. I sure hope her and the kids get to enjoy some sweet baby turkey-heads soon! She promised to send pictures of my grand-chicks if/when they hatch! I think I am just as excited as they are! I wish them all the luck in the world and hope that they enjoy their round-headed babies as much as I have enjoyed their parents!

Saturday, March 9, 2013

Spring time!


 What a beautiful spring day it was today! The feeling of a refreshing warm day spent outdoors after being cooped up inside for what seems like forever, is priceless. The blueberry bushes are in bloom and the bees are busily flying from flower to flower, happily pollinating them so I will have delicious blueberries this summer. I fertilized them earlier this week and today they got a nice long drink of water. The strawberry patch, garlic, brussel sprouts, broccoli, and flower beds had fertilizer applied today as well as a healthy drink.


 The babies got to come outside for the first time today! They are feathering out nicely and since it was warm today I opened the hatch and let them out into the chicken tractor run. The other chickens came over to visit them. The hens really weren't too interested in them, but the roosters were fascinated. Especially Jack. He loves babies. He is such a good rooster! The babies flew around and has a swell time while I cleaned out the brooder.

I dug carrots today, with help from the turkeys and my newest foster little Chicago (whether I wanted it or not...). I was really impressed with how many I got! While I was digging them I went ahead and turned all of the soil in that bed over and replanted the bed.
 

I planted spinach in one third of the bed, lettuce in 1/3 of it, and in the back I planted sugar snap peas and made a tee-pee for them to climb. It is really too late to plant them but Keegan loves them and I thought it was at least worth a try. In the bed behind that is broccoli and to the back left are brussel sprouts. They are plants that I planted in October of last year. They have been slowly growing all winter and I am hopeful that they will still produce something.

I was feeling so productive when I got done cooking dinner that I even made pizza dough for dinner tomorrow ( Keegan has a soccer game and I know it will be late when we get home), baked pumpkin bread for breakfast in the morning, and baked Italian bread. Brad got into it before I could take a picture. He tends to wait by the oven for it to get done.


I planted Amish paste, Cherokee purple, and German stripe tomatoes, bell, jalapeno, and pepperoncini peppers, and eggplant seeds on Tuesday, and I noticed that one of the Amish paste seedlings has broken the soil! I hope the rest of them join him soon. My next project is to build a shelf for the kitchen and hang the shop light I bought over it for the seedlings. After that I am going to work on new (smaller) hoop coops for the chicks once they outgrow the chicken tractor, and maybe for the turkeys until then so I can separate breeds while they are laying. Such a beautiful and productive day!

Friday, March 8, 2013

Emergency Egg Incubator

Home-made emergency incubator
First pip!
The first baby fluffing up


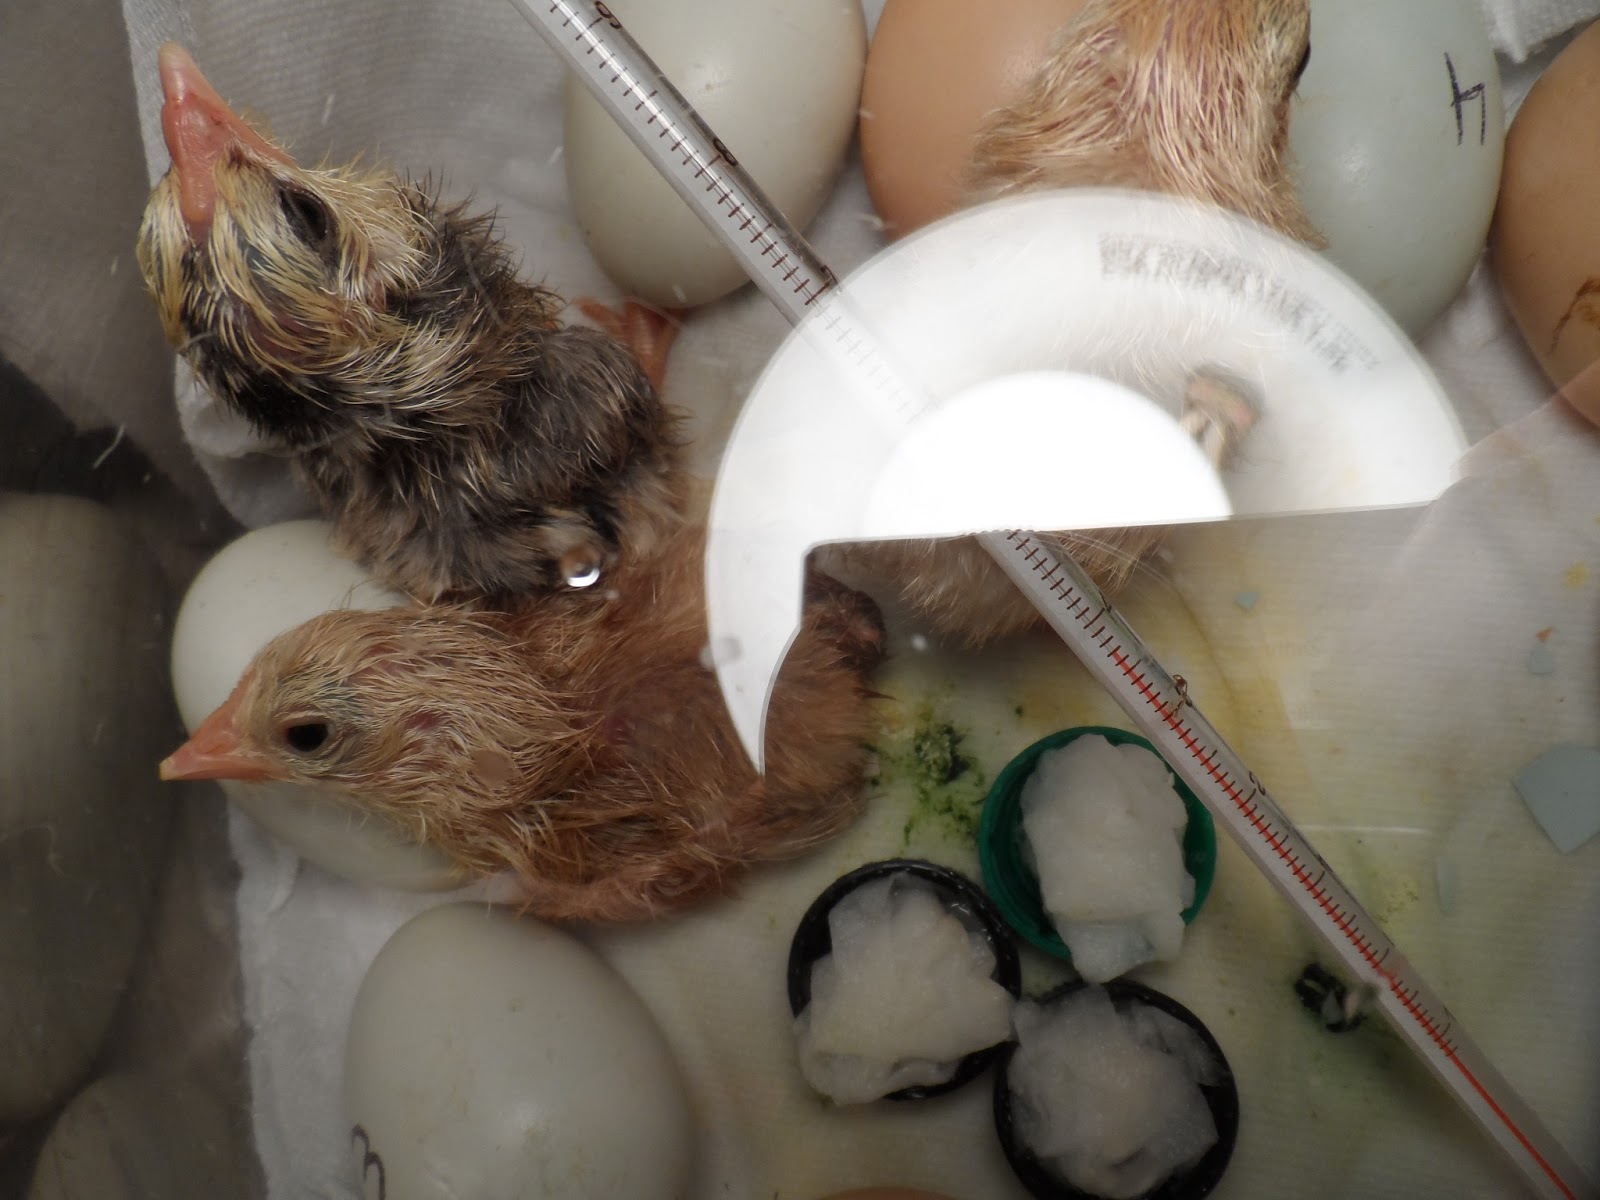
About a month ago I was having a really difficult time keeping one of my hens from sitting on every egg she saw. I only have time to collect eggs in the evening when I get home from work some days, and I really didn't want her sitting on all of them in the meantime. I decided to number some eggs and put them in the nesting box for her so she would leave the rest of my eggs alone, and because I am always secretly wishing for more fluffy butts. :) She sat on them all night and then for an hour or two during the day, then she would leave the nest and play with her friends. Oh well, at least she wasn't sitting on all of the eggs I planned to eat or sell. After about two and a half weeks I decided to candle the eggs, just to see. It turned out that there were actually babies inside! They were due to hatch on the 21st... nothing. After another week I decided to dispose of them before they turned rotten and exploded. I am always paranoid and decided to open one up just to make sure I wasn't committing mass murder, and sure enough, there was a poor little baby inside it. I was heart broken to have killed the poor thing. The eggs stayed in the nest. After a total of four and a half weeks, after putting the eggs in the nest, I found a poor sad little chick, still wet, but dead in the nest.
Come on guys, you are almost there!
Poor sweet little baby. :( Sometimes this happens, I thought, and left the momma alone. Unfortunately, it didn't stop there. I found 4 more babies, still wet, but dead in the nest. When I reached in another egg that was pipped chirped, and the broody started pecking at all of the eggs furiously! To my horror, I realized that she had been killing the babies as they hatched! Well that was just not going to cut it! I immediately went inside and started looking for something to make a make-shift incubator out of.
I took a large soup pot lined it with paper towels, and wrapped several bath towels around it. I put wet paper towels into soda caps to keep the humidity up but the bottom of the incubator dry. Next I put a thermometer in it, a sheet of plexiglass over it and set a desk lamp with a 60 watt bulb over it. I made sure the temperature was regulated by moving the lamp up and down until it stayed at the 37.5 degrees Celsius (99.5 Fahrenheit) and didn't change. Finally I went and got the eggs, making sure not to turn them, and placed them in the incubator in the same position that I had taken them out of the nest.
Wow, hatching is hard work! He somersaulted out of the
egg, landed like this, and laid there for several minutes.
He needed some rest!  
It was risky and I wasn't sure if I had killed them by moving them, but I figured that at least they had somewhat of a chance this way. Of course I watched the incubator like a hawk, and it killed me not to mess with them. Finally one pipped! And then another, and another! Three beautiful little babies hatched! One appears to be a pure buff orphington, the second an easter egger, and the third I think is a
New Hampshire Red X Easter Egger cross. I am so excited! There are 3 more eggs that are numbered and haven't pipped. I'm not sure if they will hatch, but I am leaving them for a couple more days just to make sure. She didn't exactly sit consistently.
Several more were laid after the original batch was put in the nest, so I am still hopeful that they will make, it will just be in a week or two. I have learned that I should always have an emergency incubator on hand just to make sure, but I am overjoyed that my little thrown together incubator worked! My real incubator came in the mail today. It will soon be loaded with turkey eggs!
All three babies hatched, and proceeding to fowl... uh,
foul the incubator. 
Because I only hatched 3 babies, and they are so much smaller than the babies that are in the chicken tractor brooder, I had to improvise a make-shift brooder as well. I used a large canning pot (they were hatched in a soup pot, right? May as well stick with the theme!), lined it with a plastic bag, filled it with pine chips, and connected another desk lamp to the side. Note so self... I really need more desk lamps. Apparently they come in handy. And more thermometers too! I am nearly out! Anywho, The problem with the canning pot was that I only have large waterers and they would take up the entire place. I used a 20 ounce soda bottle, lid removed. Wrapped some sturdy wire around it tightly, so the bottle won't slide up or down. turn the bottle upside down and bend the wire to make a hook. I filled the bottle with water and chick nutrients, turned it upside down into a small bowl, and hung the bottle over the side of the brooder with the opening of the bottle about 1/3 of the way into the bowl. Once the water fills to the opening it will stop. When they drink it will automatically refill to that point. Love it!
All fluffed up and in their brooder <3

Thursday, March 7, 2013

Blueberry Wine

My father in-law (to be) has been making wine for years. He has been trying to convince me to make blueberry wine since I moved down here. Finally, we managed to do it! The stores of blueberries that I had been hoarding in his freezer were getting out of hand and they needed to be used before they went bad. It was a much easier process than I ever guessed! Starting it only took about 30 minutes.

Ingredients:

1. 10 lbs blueberries
2. 4 gallons of distilled, spring, or good well water
3. 1 packet active dry wine yeast
4. 10 lbs of sugar
5. 4 tsp. yeast nutrients
6. 2 Tbs. Pectic Enzyme
7. 7 Tbs. Acid Blend
8. 2 Campden Tablets (crushed)

Steps:

1. First briefly rinse blueberries (blueberries are not cleaned before packaging or freezing) and try to remove any stems. Thaw if frozen.

2. Run the berries through a blender, just long enough to crush them up.Don't waste any juice, make sure it all ends up in the pot.

3. Pour berries into a very large (at least 5 gallon) pot or bucket. We used a large canning pot.

4. Crush campden tablets and sprinkle over blueberries.

5. Add acid blend, pectic enzyme, yeast nutrients, and sugar. Stir.

6. Add water and give it another good stir.

7. Put a lid on it and place it in a warm place over night.


8. After 24 hours, add yeast, replace lid, and let sit in warm place for about a week, until the fermentation starts to slow down. Just keep an eye on the bubbles, they will slow down. Stir everyday, preferably twice a day.

9. Strain blueberries from the liquid.

10. Allow the liquid to settle. Once settled, using a clear plastic tube, siphon the liquid out of the pot into a carboy leaving the sediment behind (he uses a 5 gallon water jug with a special attachment on the top. I didn't get any pictures of this part! Ugh! Next time!)

11. Repeat the last step at least 2 more times, spanning the time period of about 2 months. Some people say to do it at 2 weeks and again at 2 months.

12. Bottle the wine.

13. Enjoy! MmMmMm!

Thursday, February 28, 2013

Turkey Tee-Pee

 For some time, now, I have been meaning to put nests into the turkey coop. I have been at a loss, though. I'm not sure what turkey nests are supposed to look like. There really isn't a whole lot of information of turkeys, at least not heritage breeds that actually live long enough to lay eggs and retain the ability to mate. Obviously, they should be bigger than chicken nests... MUCH bigger! I have read that turkeys like to co-nest. I have put it off because of the lack of direction, and the lack of time since I have been working so much. I received my second egg yesterday! This one, too, was laid while on the roost. Thankfully, it wasn't cracked! The time has come to figure out the nest dilemma! Since I have no clear direction, and like always, not a large budget, I decided to think my way through it and use what I have on hand. Wild turkeys nest on the ground, in thickets to hide them and provide protection from predators and the elements. Obviously, being right on the ground wouldn't be preferred because the nest would get wet when it rained, so I made the base out of a pallet. One of my favorite free and very handy things!
 Then it came to me... a tee-pee  Of course! It has to be cone shaped to keep the turkeys from trying to climb on top of it (HOPEFULLY!). I used my handy dandy electric chainsaw (Keegan calls it my little baby weed wacker...) to cut some small branches. It really has turned out to be quite handy and useful. The only issues I have with it is that really small stuff gets hung in between the chain and the base and have to be continuously pulled out, and the battery doesn't last very long. 
Back on task. I set the branches up and made sure they were steady and used some twine that I reclaimed from my tomatoes last summer, to tie them in place. Then I used the next best, free, and very prolific handy dandy material I have around here. Feed Bags! They are coming out of the cracks! I hate throwing them away because they obviously won't degrade any time soon, and I am always finding uses for them. I cut them open, and starting with a layer at the bottom, placed them around the tee-pee and attached them to the limbs and the pallet with a staple gun (another favorite tool of mine!).
 Next I placed another feed bag on the bottom of the tee-pee so that the bedding wouldn't fall through. I filled it with leaves and voila! A turkey tee-pee  I know that it isn't the prettiest thing I have ever made, but I don't think that the turkeys will mind. The best part is: If it doesn't work, I'm not out anything! I still have a perfectly good pallet, the feed bags were really just trash anyway, and may still be reused, and the leaves needed to be put in the coop anyway! Now I just need to wait and watch to see if they ladies get the idea! I can't wait! Tabby was already checking it out when I finished and put them up for the evening!


Monday, February 25, 2013

I Finally Got It!


I got my first ever turkey egg today! They have been mating for the last couple of weeks but I was beginning to think I would never get any eggs! I am so excited! Poor girl didn't know any better than to lay it while she was sitting on the roost and it is cracked. I still don't think that it would be any prettier if it were made of gold. Now I need to get an incubator so I can have new sweet baby turkey heads. <3 

Tuesday, February 19, 2013

The Chicks Have Arrived!


I'm not sure what breed this guy is. He is the most curious
of all of the chicks though!
Keegan's Gold Laced Cochin Pullet
Sleepy Babies, don't fall asleep in your food!
Buff Orphington, Cochin, Barred Rock
I believe that if happiness could come in a box, it would look like this! I get completely giddy when I get a box full of chirping fuzzy goodness! I also get super paranoid that something terrible will happen. I had hoped that I would receive my box on my day off, but of course they arrived the day after (on time). That meant that I had to drop my son off at school, run to the feed store to get chick starter, get to the post office to pick up the babies, speed home to get the littles into the brooder before they froze their fuzzy little butts off, and then had to leave and go to work. Of course I had thoughts of brooder lamp fires, over heated chicks, frozen chicks, and drowned chicks all day long. Aside from the one that didn't make the trip, I am happy to say that they all survived my going to work. It is since then that we have had issues. They all seem perfectly healthy, running around, eating, drinking, and then I will wake up to a couple dead. Not sure what the problem is... The temperature is fine and they are all moving around freely, rather than being all huddled under the light as if too cold, or spread around the edges of the brooder as if too hot. Note that in the pictures it looks like they have no room and are piled on top of each other, but they all like being in the same place at the same time. They run around, but then when they get sleepy they pile up together. They
actually have plenty of room, but I preferred to take
pictures of chicks rather than empty pine chips. :)

 I am calling Ideal today to report the losses, which include at this point:
- 1 Brown Leghorn pullet
- 1 Gold Laced Cochin pullet
- 1 New Hampshire
- 1 Silkie
- 3 All Heavy Male Assortment
      (2 rhode island reds, 1 buff orphington)
Ramona, one of my Easter Eggers
I have waited the full 4 days just to make sure that there are no more losses. I really hate losing babies. Sometimes they just can't handle the trip though, and there is nothing that can be done. I hope they are all good now!
I have been keeping them inside in a ferret cage because it has been quite cold and wet outside the last few days. It seems to be much warmer and is definitely drier today so one of my projects needs to be to pull the brooder tractor out to the sun, clean it out, and let it dry. I have a lot of projects in queue for today, including taking one of my foster littles (noodles) up to the shelter, an hour away, so she can leave bright and early in the morning on the transport to find her very own forever home! Yay! So she gets a bath and the borrowed kennel has to be sterilized before it is sent back. I think it is probably strange that I feel the need to wash their dog before returning it so they don't think I let it get dirty or anything... Speaking of cleaning, I also need to clean once she is gone and I have 4 less feet running around the floor! Ha ha I'm hopeful that one less dog (I still have my two and another foster little getting over Pneumonia running around) will make it possible! I also have to do the soccer mom thing this evening until after dark, which I LOVE. I always bring a book to read, or things to study, and still end up spending the whole time watching Keegan practice.

So much to do! I have probably spent too much time sitting still. I really want to have a super productive day off! Hope you all have a beautiful day and feel free to leave a comment! I'd love some feed back.

I'm not sure what breed this baby is either, but he is beautiful!
He is brown and a gorgeous blue color. Behind him is my
brown leghorn pullet. 

One of my Blue Silkies. They are so little! This baby is sitting on my pinky
finger, and I have very small fingers as it is. 

I think this is one of Keegan's Silver Spangled Hamburgs. Fast little buggers!
It took a while to get a picture of it where it looked like more than a blur.

I just love my baby blue silkies!